Freezer Paper FPP Pillow Tutorial

If you’ve followed me a while, you’ll know I absolutely love using freezer paper for foundation paper piecing (FPP)! With this method, templates are reusable and there is no tedious paper removal step. This is a great method for making the Ascend Quilt or Candy Corn Picnic Quilt, which use multiple blocks made from the same FPP template. This method differs from the traditional method because the waxy side of freezer paper will hold the fabric to the template, eliminating the need to sew the fabric directly to the template.
This tutorial is intended for those who already know the traditional method of FPP, but an ambitious quilter could learn from this tutorial regardless. I’ve introduced a free 6" block template called the Sway Block to teach you my method for freezer paper FPP. Download it using the button below. The pillow uses four Sway Blocks, but you only need to print one template!

I’ve listed the supplies used for this pillow. Many of the tools are optional, but if you use this technique a lot, the nominal investments are worth it!
Scrap Fabrics A-E (for the 18" pillow, you will need about ½ yd of Fabric A, but scraps should do for the rest.)
19" square of pillow backing material
18" pillow insert or pillow stuffing
Freezer paper (I just use a roll, but you can get printer-sized sheets)
Printer paper (optional)
Ink jet Printer
Seam roller (optional)
Add-A-Quarter ruler (optional)
Rotary cutter and standard quilting ruler
Iron and pressing surface
I used the following palette of Art Gallery Fabrics Pure Solids for this project. For different effects, you can use the same color for two or more of the Fabrics.

Prepare the template
So, what is freezer paper? Freezer paper is designed to prevent freezer burn for frozen foods. I’ve literally never used it for this purpose. It’s essentially parchment paper with one side coated in wax. When this wax is heated, it melts and sticks to fibers. The bond isn’t permanent, however, which makes the freezer paper easy to remove. For this reason, crafters have taken advantage of freezer paper for temporary templates in a myriad of ways.
You’ll need to cut your freezer paper down to letter or A4 paper size, depending on what your printer is set to print. You can purchase sheets of freezer paper precut to this size, but I just cut from my roll and use my quilting rulers and rotary cutter.

You will want to print our template on the non-waxy side of the paper. In theory, you should just be able to load properly sized sheets of freezer paper into your printer and print. In practice, I usually get a jammed printer when I do this. I started using a “carrier sheet” of standard printer paper to help feed the paper into the printer. To use a carrier sheet, lay your freezer paper sheet on top of a printer paper sheet with the waxy side down. Line up the edges and corners well. With your iron on a low setting, iron the stack about a quarter inch deep along both short edges. This adheres the freezer paper to the printer paper. Wherever your papers are stuck together, they may be forever inseparable; so make sure you’re not ironing where important parts of your template will be printed!

Now, load your freezer paper (with our without carrier sheet, whichever your printer prefers) so that your printer will print on the non-waxy side of the freezer paper. If you’re using a carrier sheet, make sure the feeder will grab an edge that is sealed with the iron. In your print menu, make sure you’re printing actual size or at 100% scale. After printing, check the scale box on the template with a ruler to be sure everything is correct.

At this point, you can peel or cut away the edges adhered to the carrier sheet and discard the carrier paper. Cut your template around the dashed lines.

Fold along all the seam lines. Extend the folds across the entire template (i.e., even if the seam line doesn’t go edge to edge, make your fold goes edge to edge).

Preparation of freezer paper FPP templates requires more work than traditional paper FPP templates. However, you only need to do this once, as each template can make up to a dozen blocks! Plus, you’ll save yourself the hassle of tearing out paper at the end of each block.
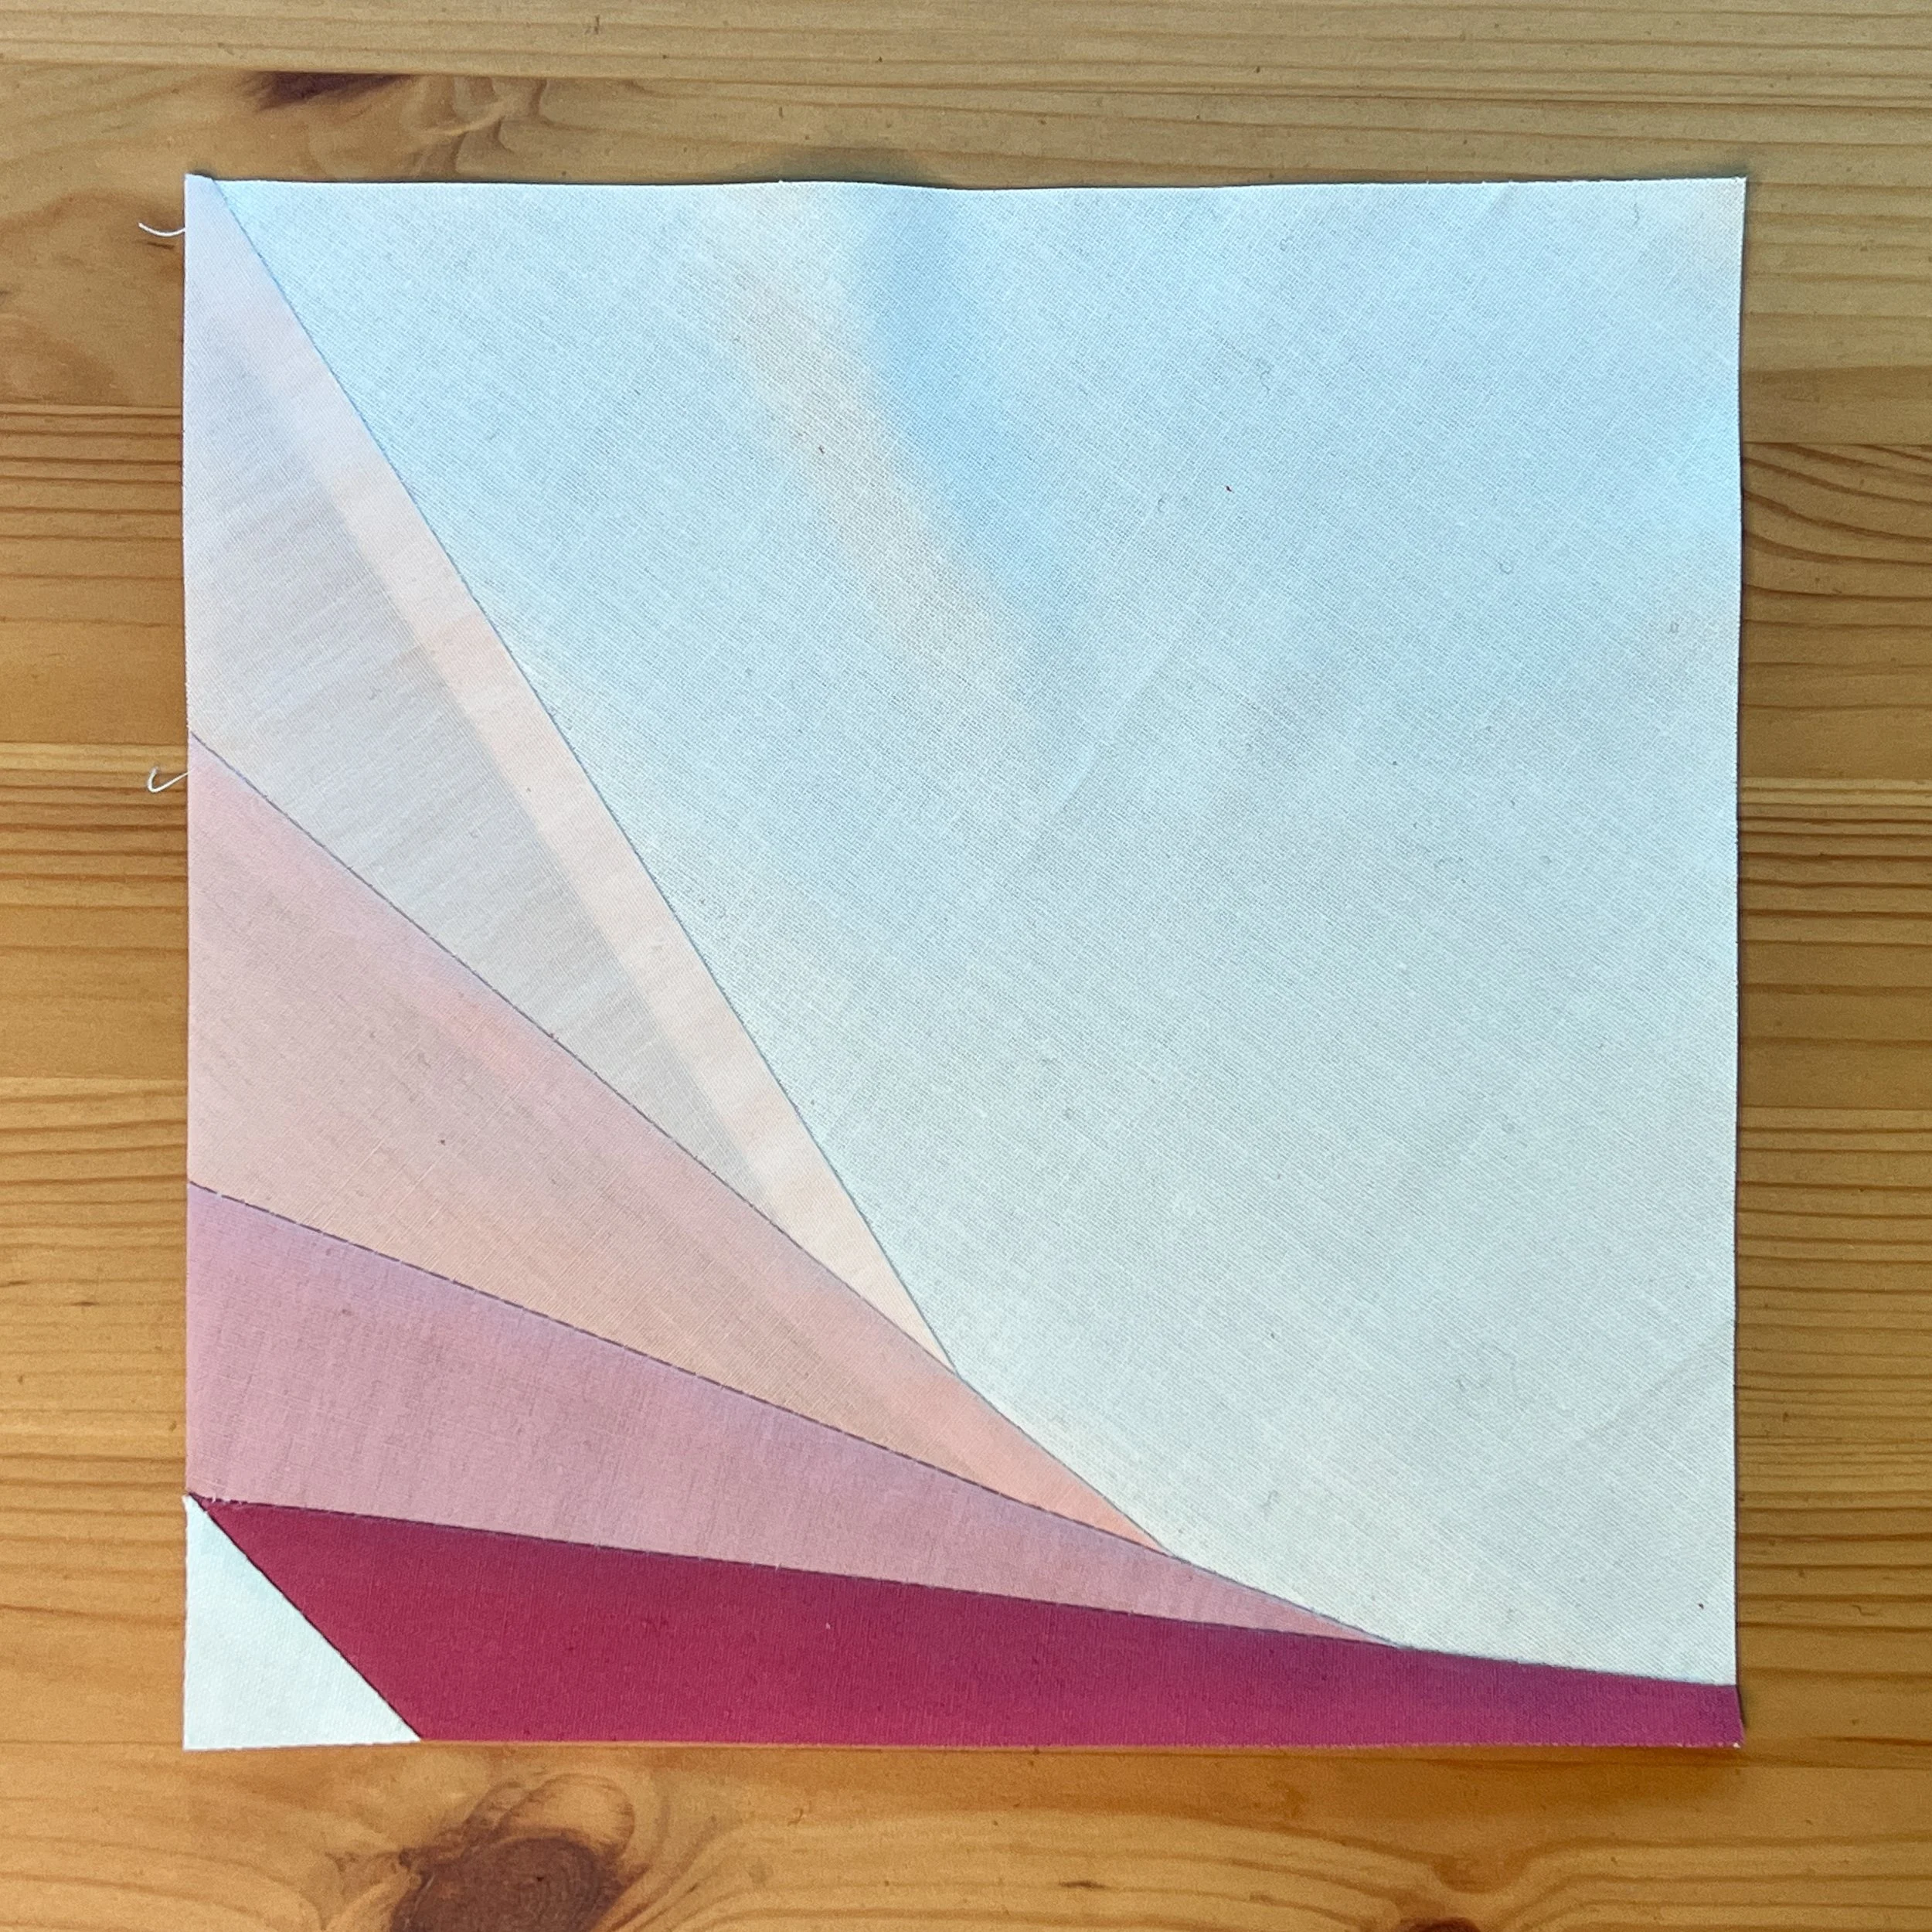
Make the block
Place the template face down on your pressing surface (with the waxy side up). Cut a piece of Fabric A so that it is large enough to cover region 1 with at least ¼" excess on each side for seam allowance. Place it right side up over the template. Press with a hot iron (I use the highest setting). You may need to hold the iron in place for a few seconds. Now your fabric is attached to your template! When pressing, do not put your iron directly on the waxy side of the freezer paper.

Flip the template over and fold back along the seam line separating regions 1 and 2. You may have to peel off some fabric if you were overzealous with the iron. Cut a piece of Fabric B that is large enough to cover region 2 with a minimum ¼" excess on all sides. Place it right side up on your work surface, then place the folded template on top. You should have the right sides of Fabric A and Fabric B together. Line up the components so that region 2 on the back of the fold completely covers the piece of Fabric B with a ¼” seam allowance on each side. You may have to do some lifting and peeking to check this alignment.

Carefully, take the stack to your machine. DO NOT unfold the template. Instead, place your needle so it’s just next to the fold line. Sew just to the side of the fold line, stitching only through fabric. Start and stop ¼" from the beginning and end of the seam line (the printed line), backstitching at the ends. (Note: unlike traditional FPP, you can keep your stitch length at your preferred piecing length; there is no need to shorten it!)


Trim the seam allowance to ¼". I like to use an Add-A-Quarter ruler. It has a lip that nestles right on the fold of the template, which makes aligning easier. You can use a standard quilting ruler, as well.

Unfold the paper and flip the stack. Fold the Fabric B piece over the seam. Finger press or use a seam roller.

Use your iron to press the seam and adhere Fabric B to region 2 of the template. (Note: If you skip the finger pressing/seam rolling step and just push the fold with your iron, you might stretch the fabric. Your block may contract or warp once you remove the template).

Repeat the process by folding the template on the seam line separating regions 2 and 3, aligning Fabric C with region 3, sewing along the fold, trimming the seam, and pressing the seam. Continue in order for all of the regions, using the fabric indicated on the template. Once the template is filled, trim the block to the dashed seam allowance lines using your standard quilting ruler and rotary cutter.

This is when the magic of the freezer paper method really happens. Starting at a corner, simply and gently peel the template off the back of your block.

Ta-da! You have a Sway Block! Even better, your FPP template is alive and well and ready to be used again. I’ve been able to make more than a dozen blocks from a single template. Your mileage may vary, but once the fabric stops sticking, you know it’s time to make a new one. You will need three more blocks to make the pillow.
When to use this method
This method doesn’t lend itself to all FPP patterns. It works best with blocks that are built starting at the corner or edge. If you use it for a template that starts in the middle, you might need a mini iron or an extra large fabric piece to adhere the first piece without setting your iron directly on the waxy surface. If you only want to make one block, it may be simpler to use the traditional method.
Finishing the pillow
To make this 18" pillow, arrange four blocks as depicted and sew together. Then, cut two 12 ½" x 3 ¾" rectangles from Fabric A and sew to the sides. Repeat on the top and bottom with two 19" x 3 ¾" rectangles. This makes a 19" square quilt top. Baste, quilt, and trim as desired. With a 19" square of material for the pillow back, assemble using your preferred pillow construction method, using a ½" seam allowance. Slip in an 18" pillow insert and now you have a beautiful pillow! Use the Sway Block in other quilting projects, too!

Have fun playing with the Sway Block template and tag your creations on social media using the #SwayQuiltBlock and #SweetPixelQuilts hashtags!
Are you ready to use this method on another project? Check out my Ascend Quilt and Candy Corn Picnic Quilt patterns!
