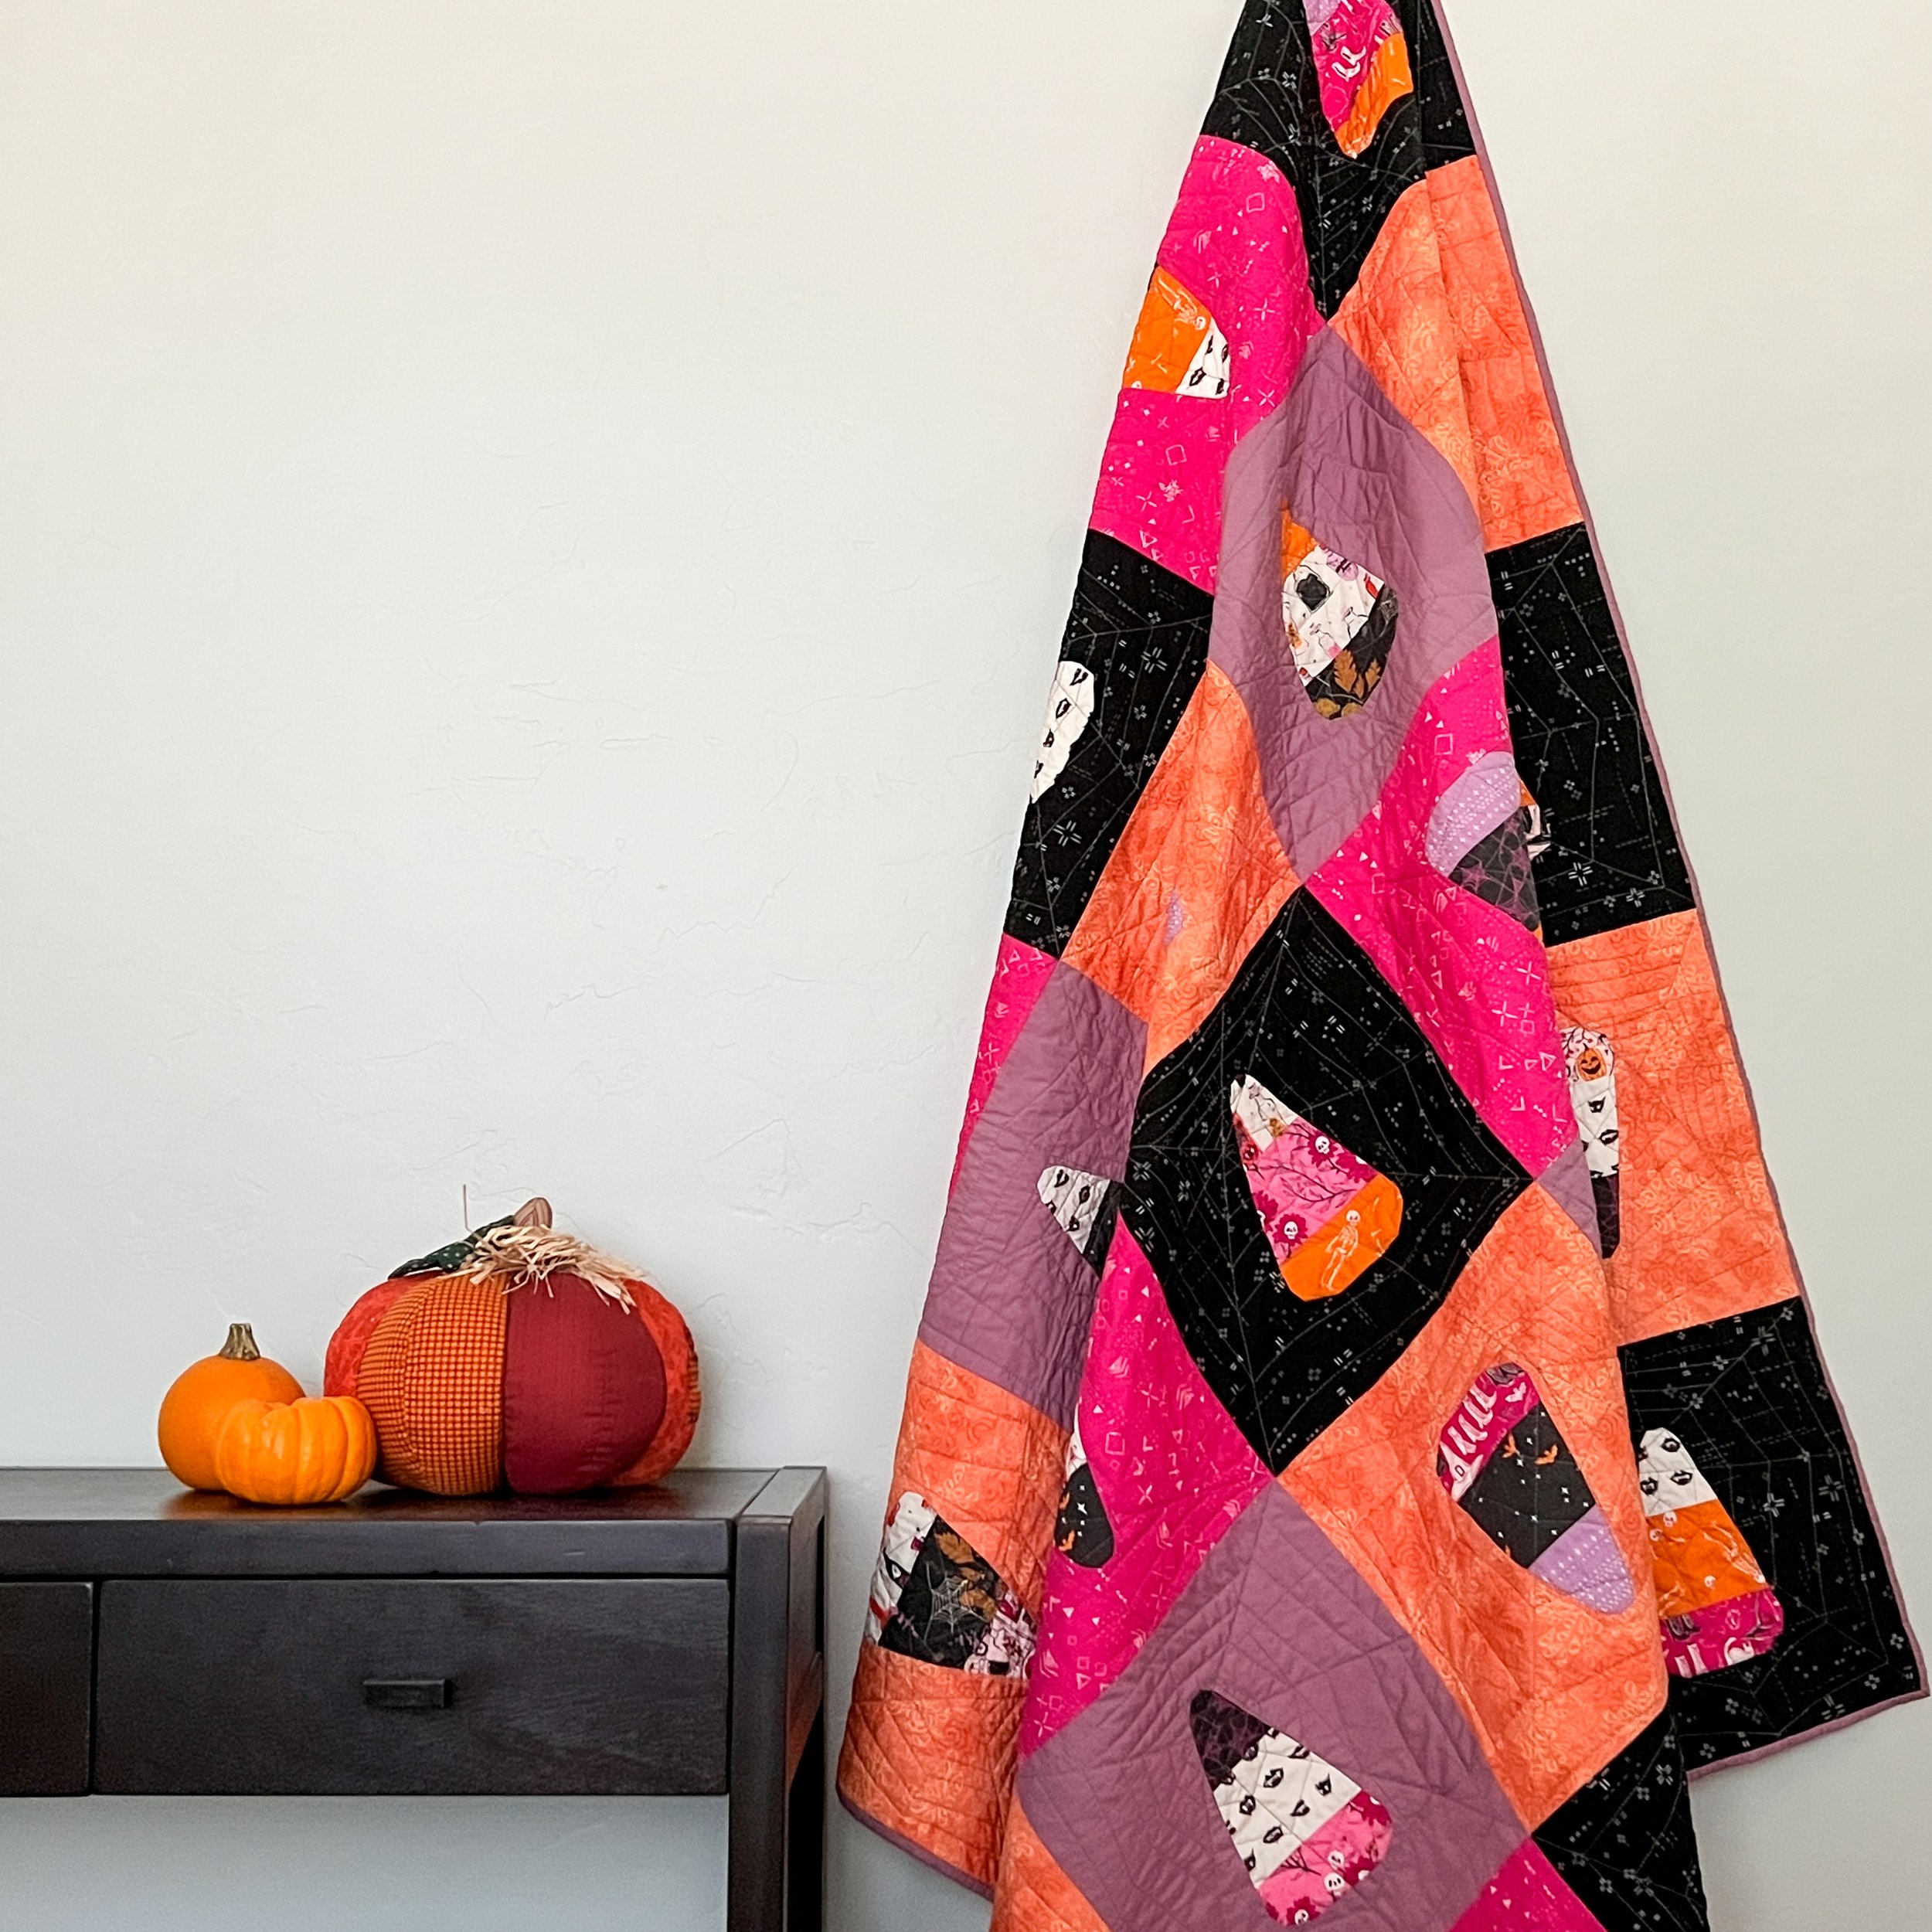
The Candy Corn Picnic Quilt: Free Pattern!

Boo!
It’s Halloween! I think everyone loves something about Halloween. It’s a holiday that involves fantasy, imagination, and one-upping your friends with the best costumes, jack-o-lanterns, and decorations. No one questions you when you pick up last-minute trick-or-treat candy while dressed in a ballgown. Though many people relish in the macabre, or spiritual, or downright disturbing aspects of Halloween, I derive my joy from the sweet and adorable! I love creative couple costumes, spiced apple cider, and of course, the copious piles of candy I overbought for the trick-or-treaters.
So, I give to you the Candy Corn Picnic quilt!
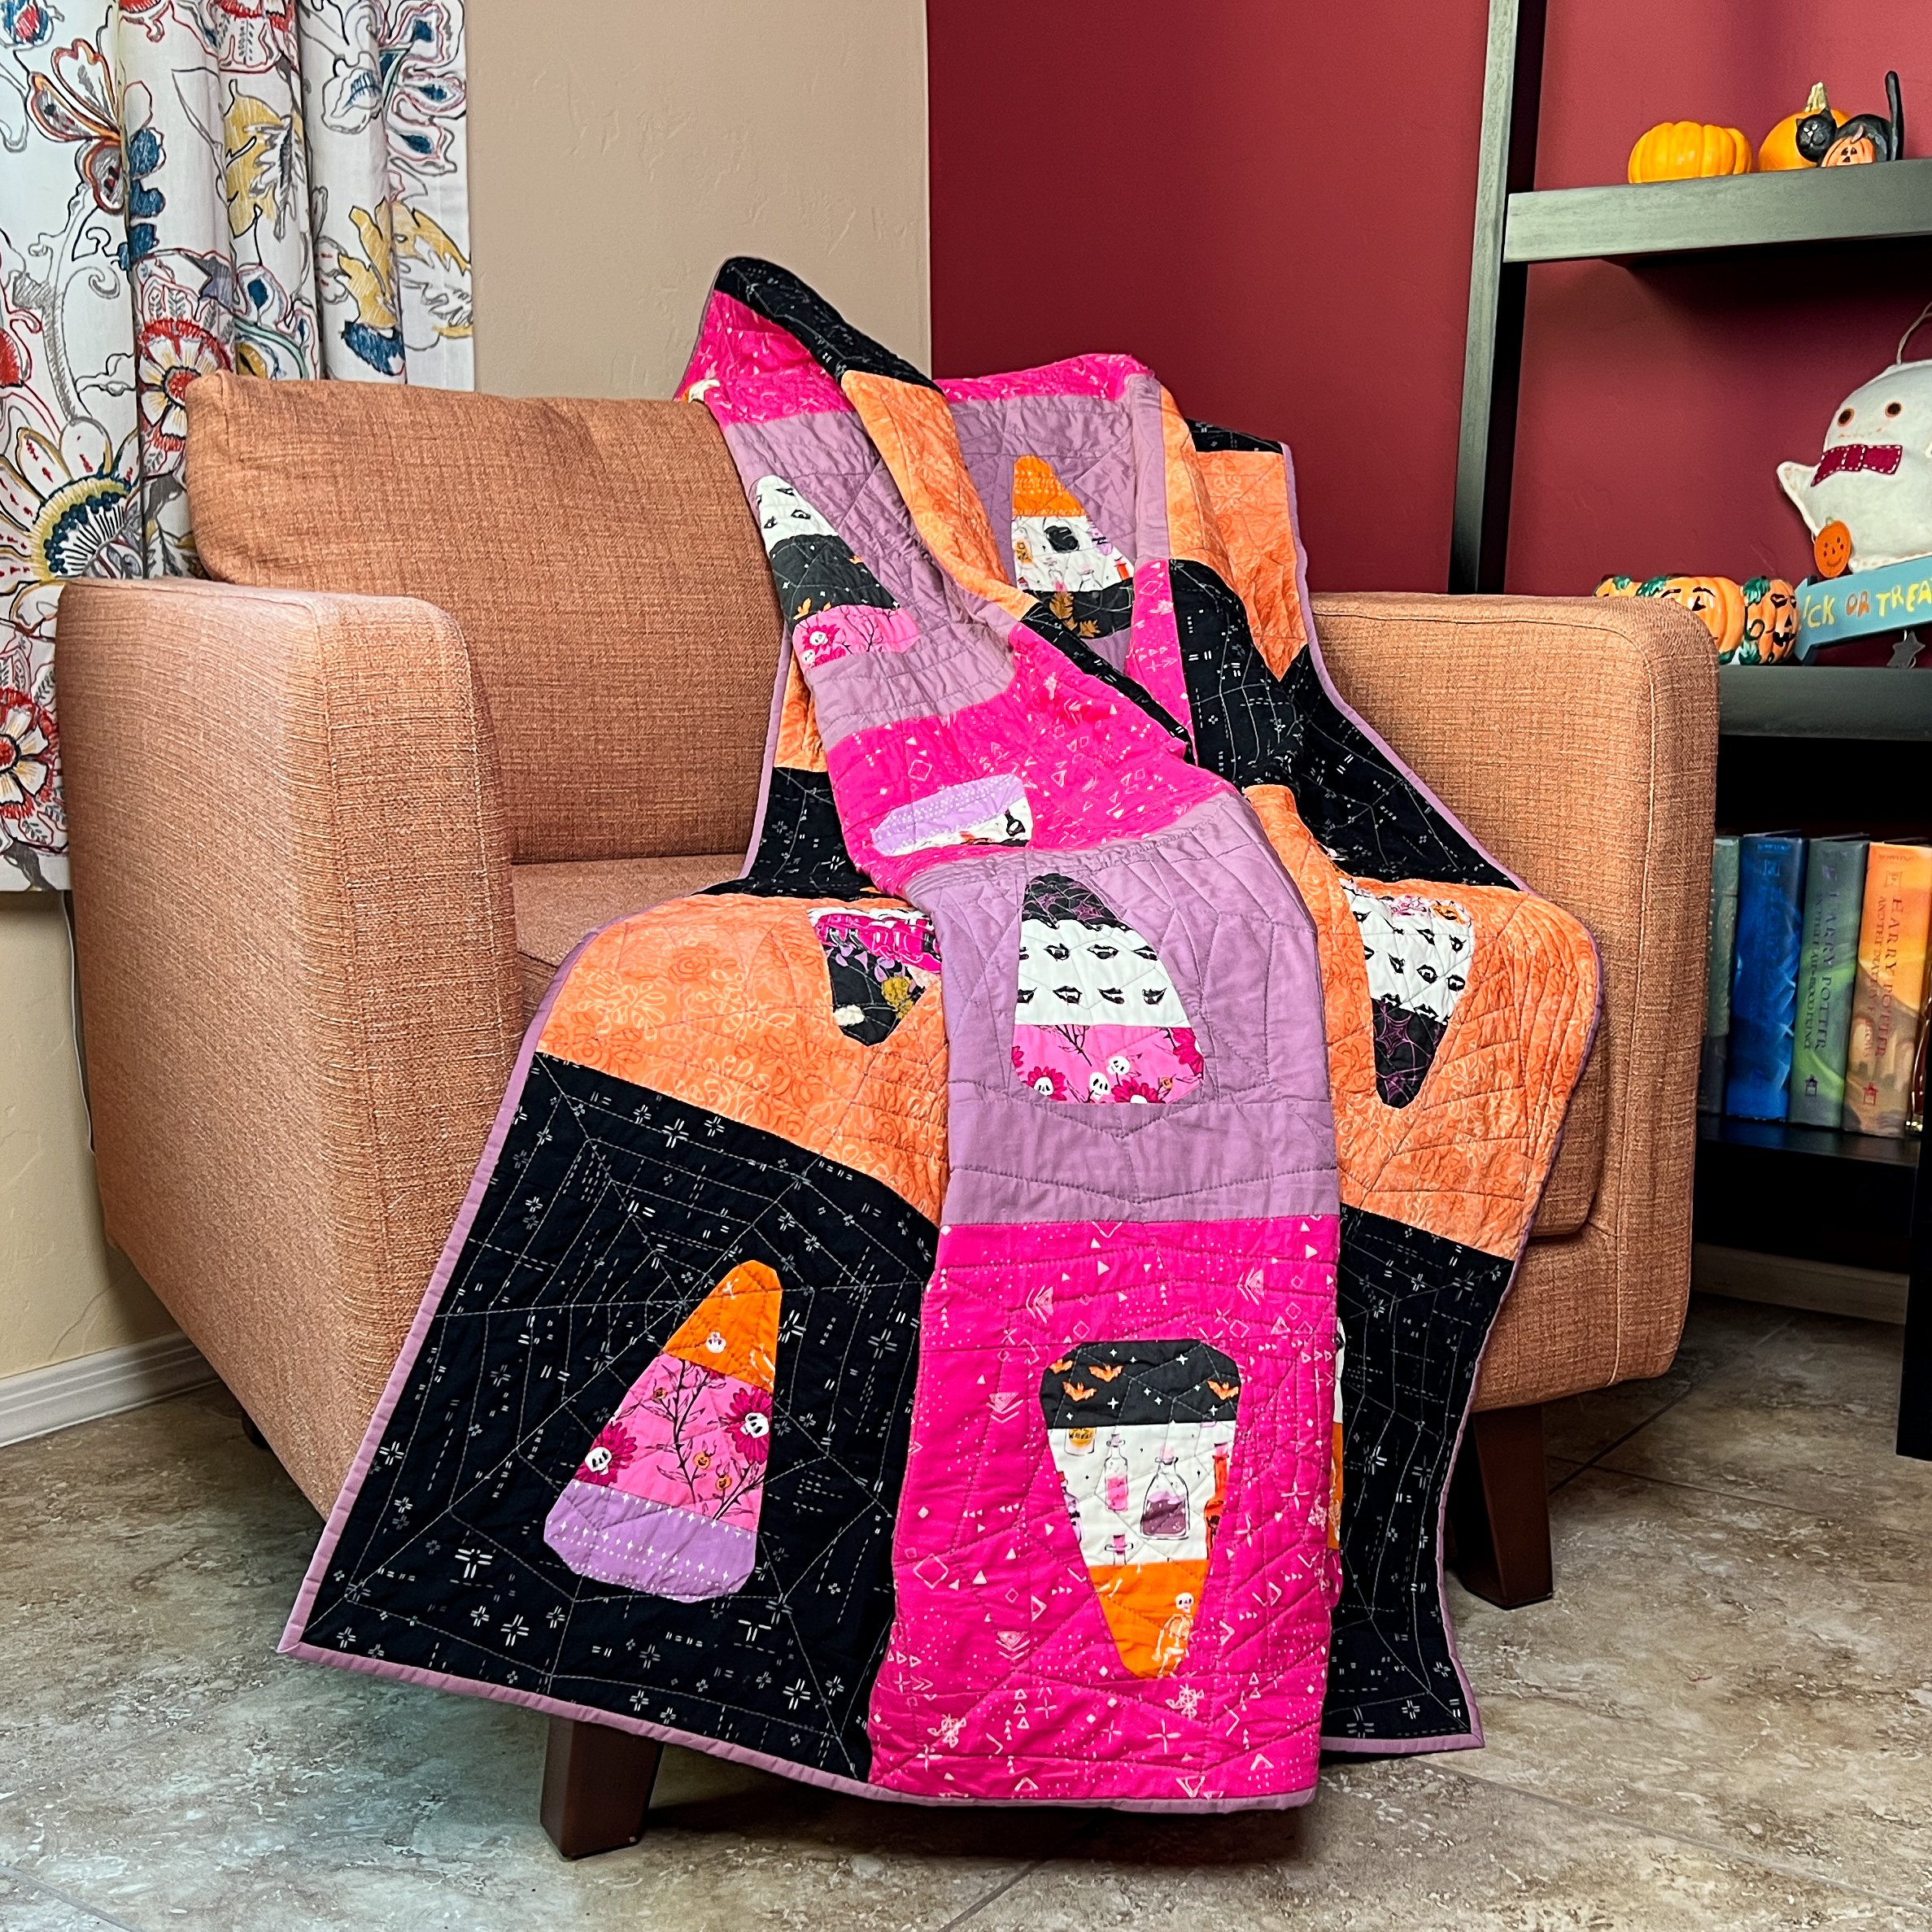
The name comes from the classic check pattern of the blocks which evokes the warmth of the flannels you’re pulling out for the cooling temperatures. To stay extra warm, the quilt finishes at 60" square for an extra large throw for sharing.
You may have an aversion to the taste of candy corn, but you can’t deny how iconic the candy is! This quilt pattern uses the Candy Corn Charm foundation paper piecing (FPP) pattern. It’s a fairly simple pattern that doesn’t require aligning segments. Even if you don’t want to make a full quilt, this pattern would be great to make other Halloween decorations or apparel!

Candy Corn Picnic Quilt Pattern
Below are fabric requirements and instructions for two different versions of this 60" x 60" quilt: the traditional colors version and the scrappy version.

The traditional colors version layout

The scrappy version layout
You’ll need the Candy Corn Charm FPP block template. There are 25 of these 5" x 7" finished blocks in this quilt, so either print the template 25 times, or use the freezer paper method for FPP. Using this method, I only needed 4 templates to make the entire quilt top!
Pattern Assumptions:
Seam allowance - ¼"
Width of Fabric (WOF) - 42"
Fabric Requirements
Background (both versions):
Black: 1 ½ yd.
Pink: 1 yd.
Light orange: 1 yd.
Lavender: ¾ yd.
Candies (traditional colors version):
Yellow: ½ yd.
Dark orange: ½ yd.
White: 1 fat quarter
Candies (scrappy version):
9 fat eighths (21" x 9")
You will also need ½ yd. of fabric for the binding and 3 ¾ yd. for the backing.
Cutting Instructions
Background (both versions):
Cut the following pieces from the different background fabrics. Save the scraps and the remaining yardage for construction of the FPP blocks.
Black:
18- 4" x 7 ½" rectangles
18- 12 ½" x 3" rectangles
Light orange and pink:
12- 4" x 7 ½" rectangles each
12- 12 ½" x 3" rectangles each
Lavender:
8- 4" x 7 ½" rectangles
8- 12 ½" x 3" rectangles
Candies (traditional colors version):
These suggested sizes of pieces for the candy corn colors are large enough for beginner paper piecers. You can make do with less fabric if you work with smaller pieces. The absolute minimum sizes for the pieces are listed on the FPP template.
Yellow: 25- 5 ½" x 3"
Dark orange: 25- 5" x 4"
White: 25- 3 ½" x 3 ½"
Candies (scrappy version):
From each fat eighth, cut 3 pieces to be used for each of the sections 1-3 from the FPP pattern. The diagram below shows a suggested cutting layout. The sizes of each piece are ample enough for beginner paper piecers.
Section 1: 5 ½" x 3"
Section 2: 5" x 4"
Section 3: 3 ½" x 3 ½"

Fat eighth cutting diagram for the scrappy version
Binding (both versions):
Cut 7- 2 ¼" x WOF strips.
Piecing Instructions
If you’re making a scrappy version, arrange 25 sets of 3 scrappy pieces, one of each size. If you used the cutting instructions for the fat eighths, you will have two extra of each size. If you’re making the traditional colors version, arrange 25 sets with 1 yellow, 1 dark orange, and 1 white piece each.
Piece 25 candies. Use scraps and remaining yardage from the block background colors for sections 4-13. You will need 9 candies with black backgrounds, 6 with orange backgrounds, 6 with pink backgrounds, and 4 with lavender backgrounds.
For each candy corn block, sew the corresponding background pieces to each block as shown to make 12 ½" unfinished blocks. First, sew the 4" x 7 ½" rectangles to the left and right sides of the candy block. Then, sew the 12 ½" x 3” rectangles to the top and bottom. Press seams away from the candy block.

Block assembly diagram
Arrange the blocks into a check pattern. Play around with the orientations of the candies to create your own unique arrangement!
Sew the blocks into rows, and then sew the rows into a finished quilt top. Press seams as desired.
Finishing Instructions
Cut the backing fabric into two equal lengths. Align the selvages of the two pieces with right sides together. Sew a seam about 1 ½" from the selvage and trim the seam to ½". Press open.
Make a quilt sandwich by layering the backing (wrong side up), the batting, and the quilt top (right side up).
Quilt as desired.

I quilted a block-based spiderweb design with my walking foot!
Using a bias seam, sew the WOF binding strips into a long strip. Bind as desired.
Share on social media using the #CandyCornCharmBlock, #CandyCornPicnicQuilt, and #SweetPixelQuilts hashtags. Enjoy your sugary quilt!