Spiderweb Quilting: Walking Foot Tutorial
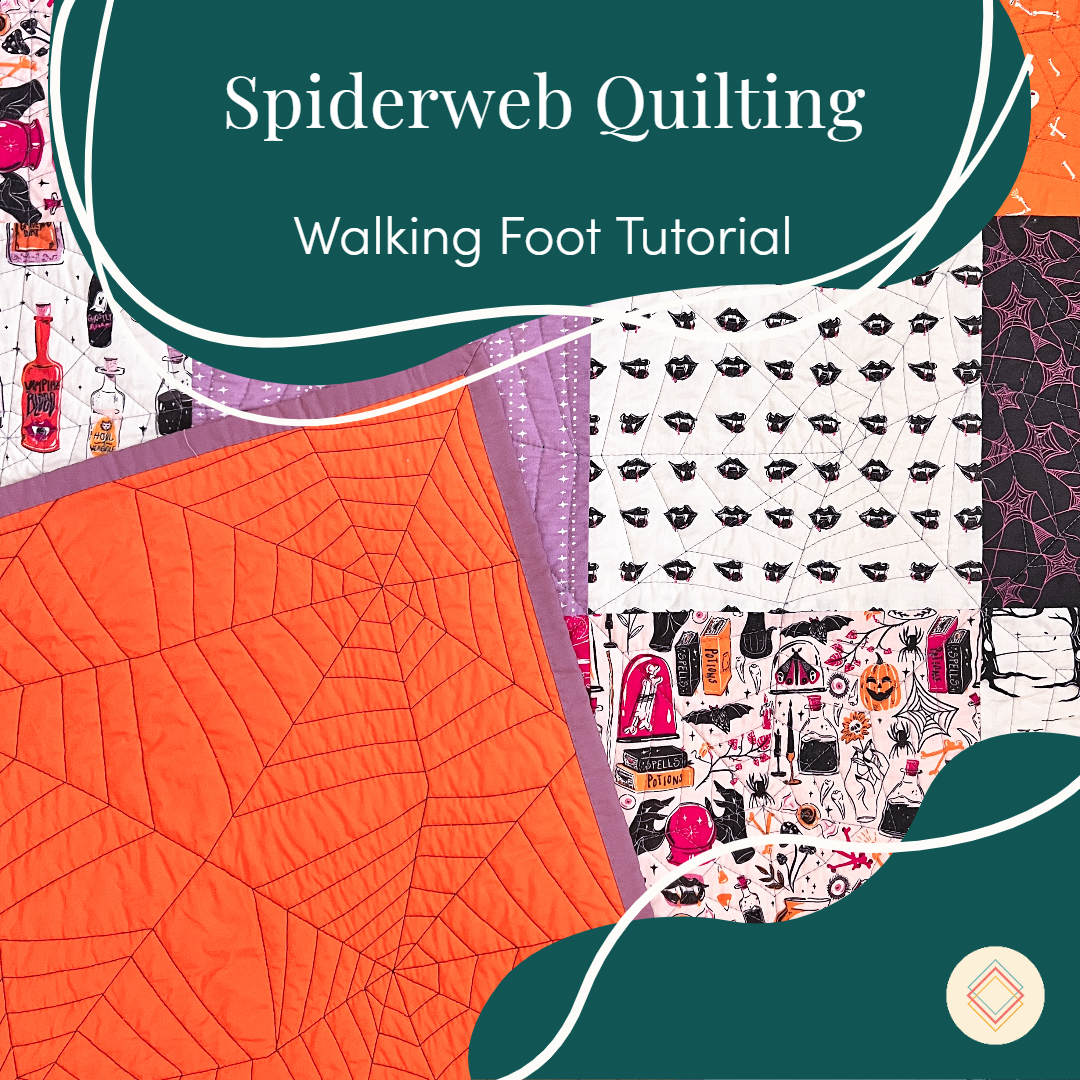
Happy Spooky Season!
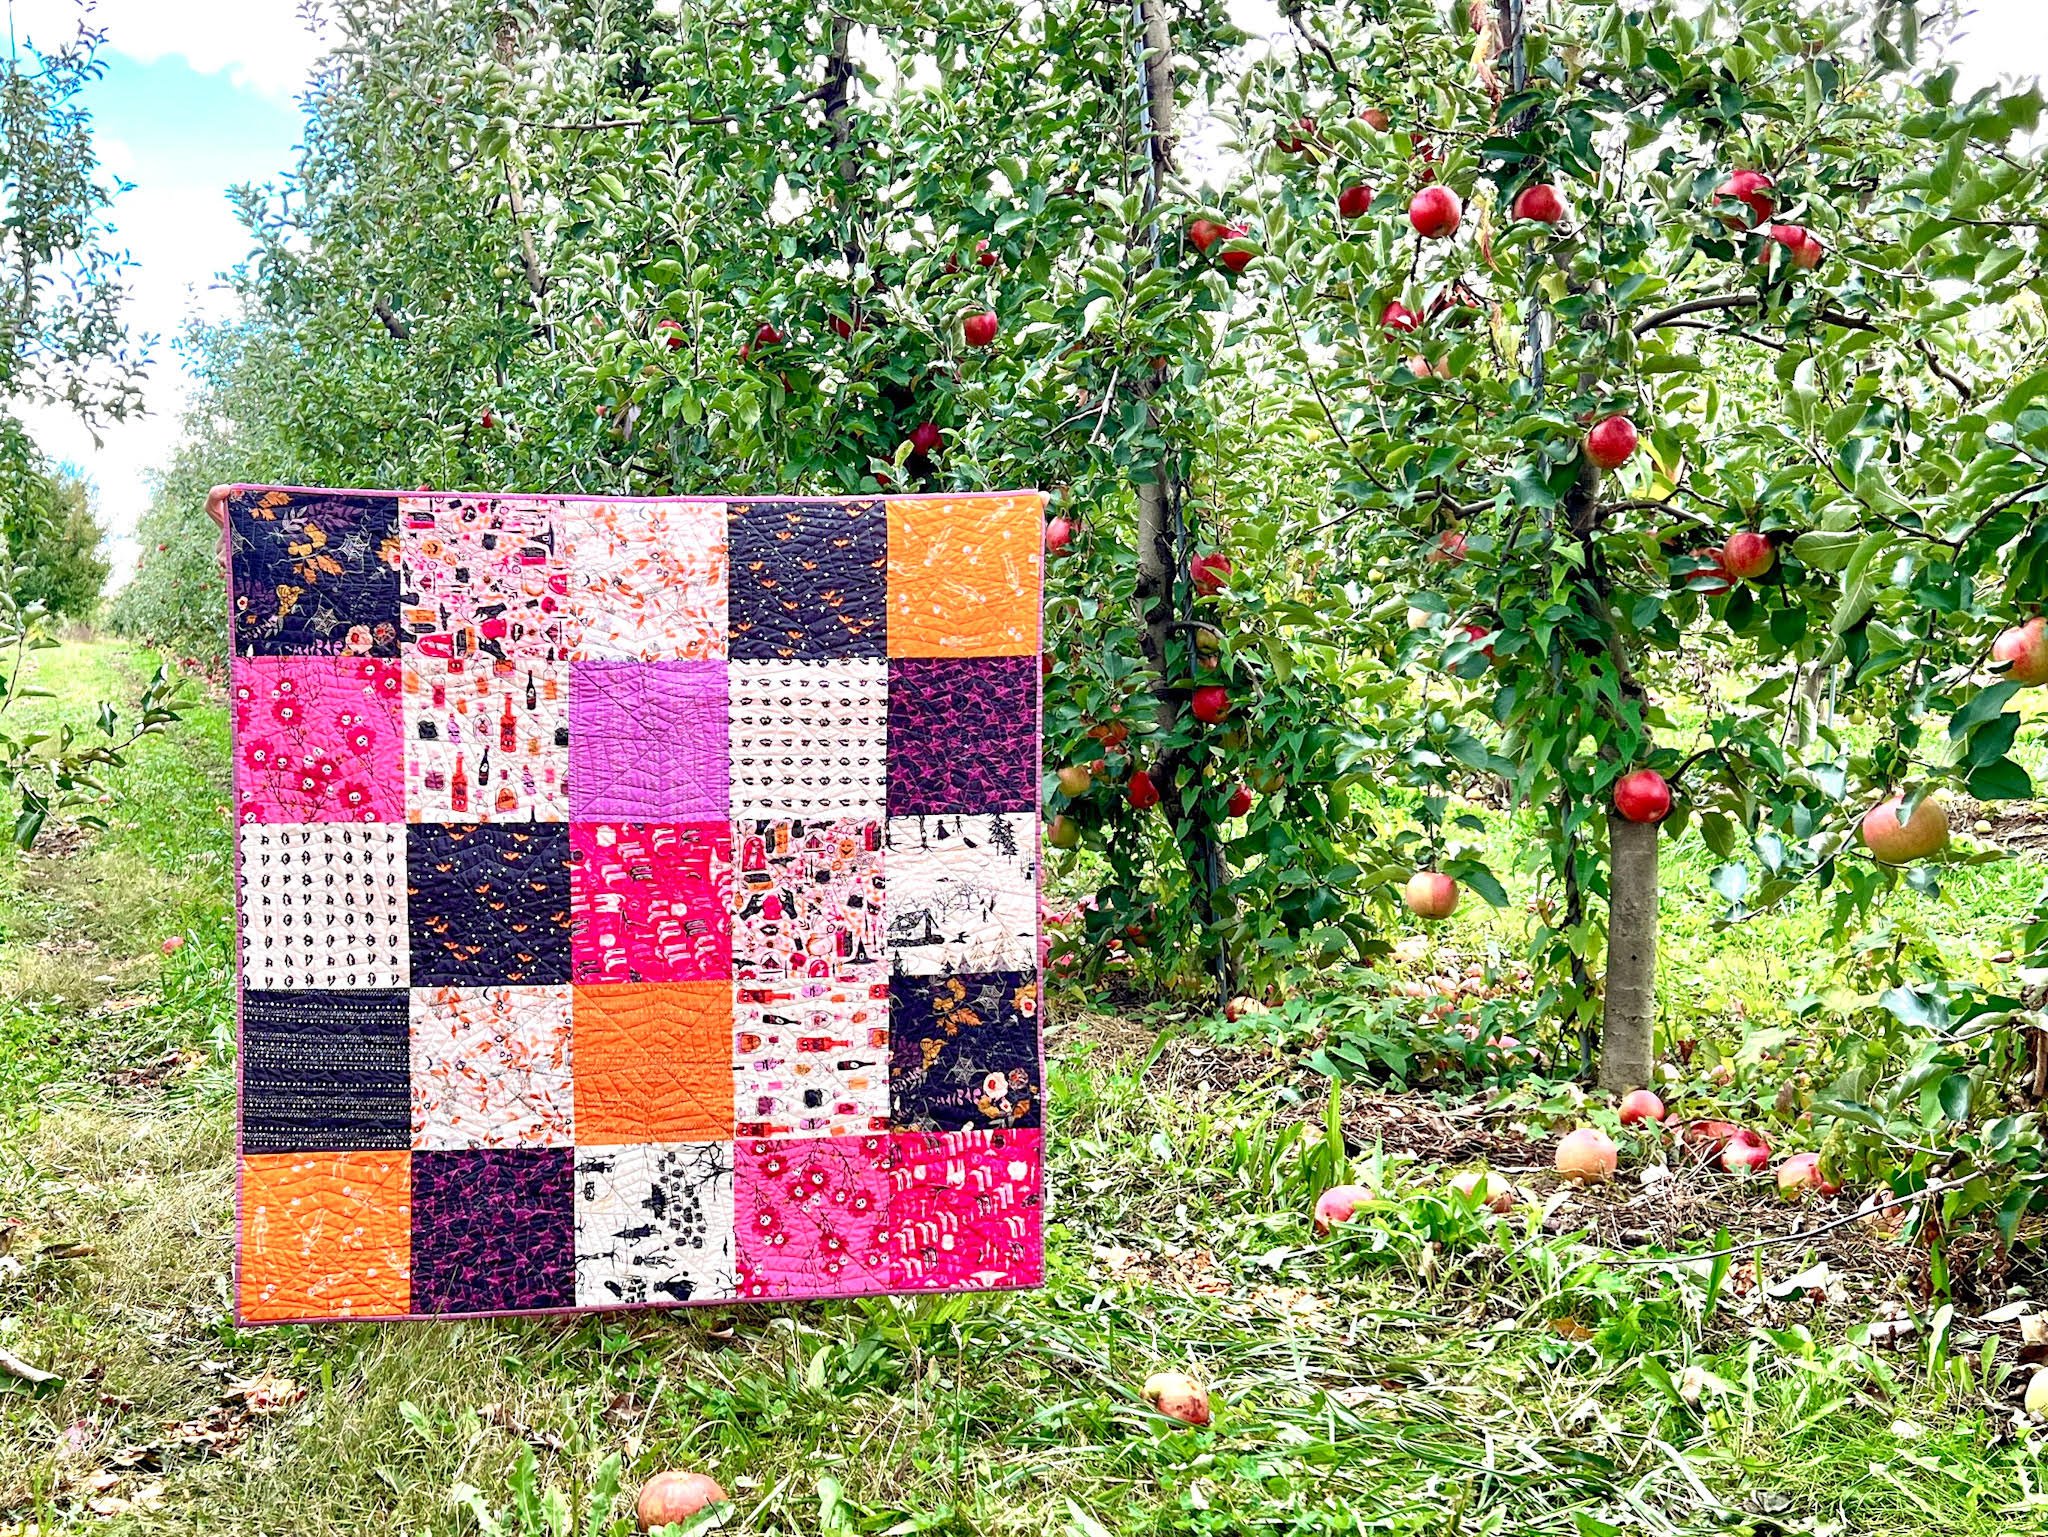
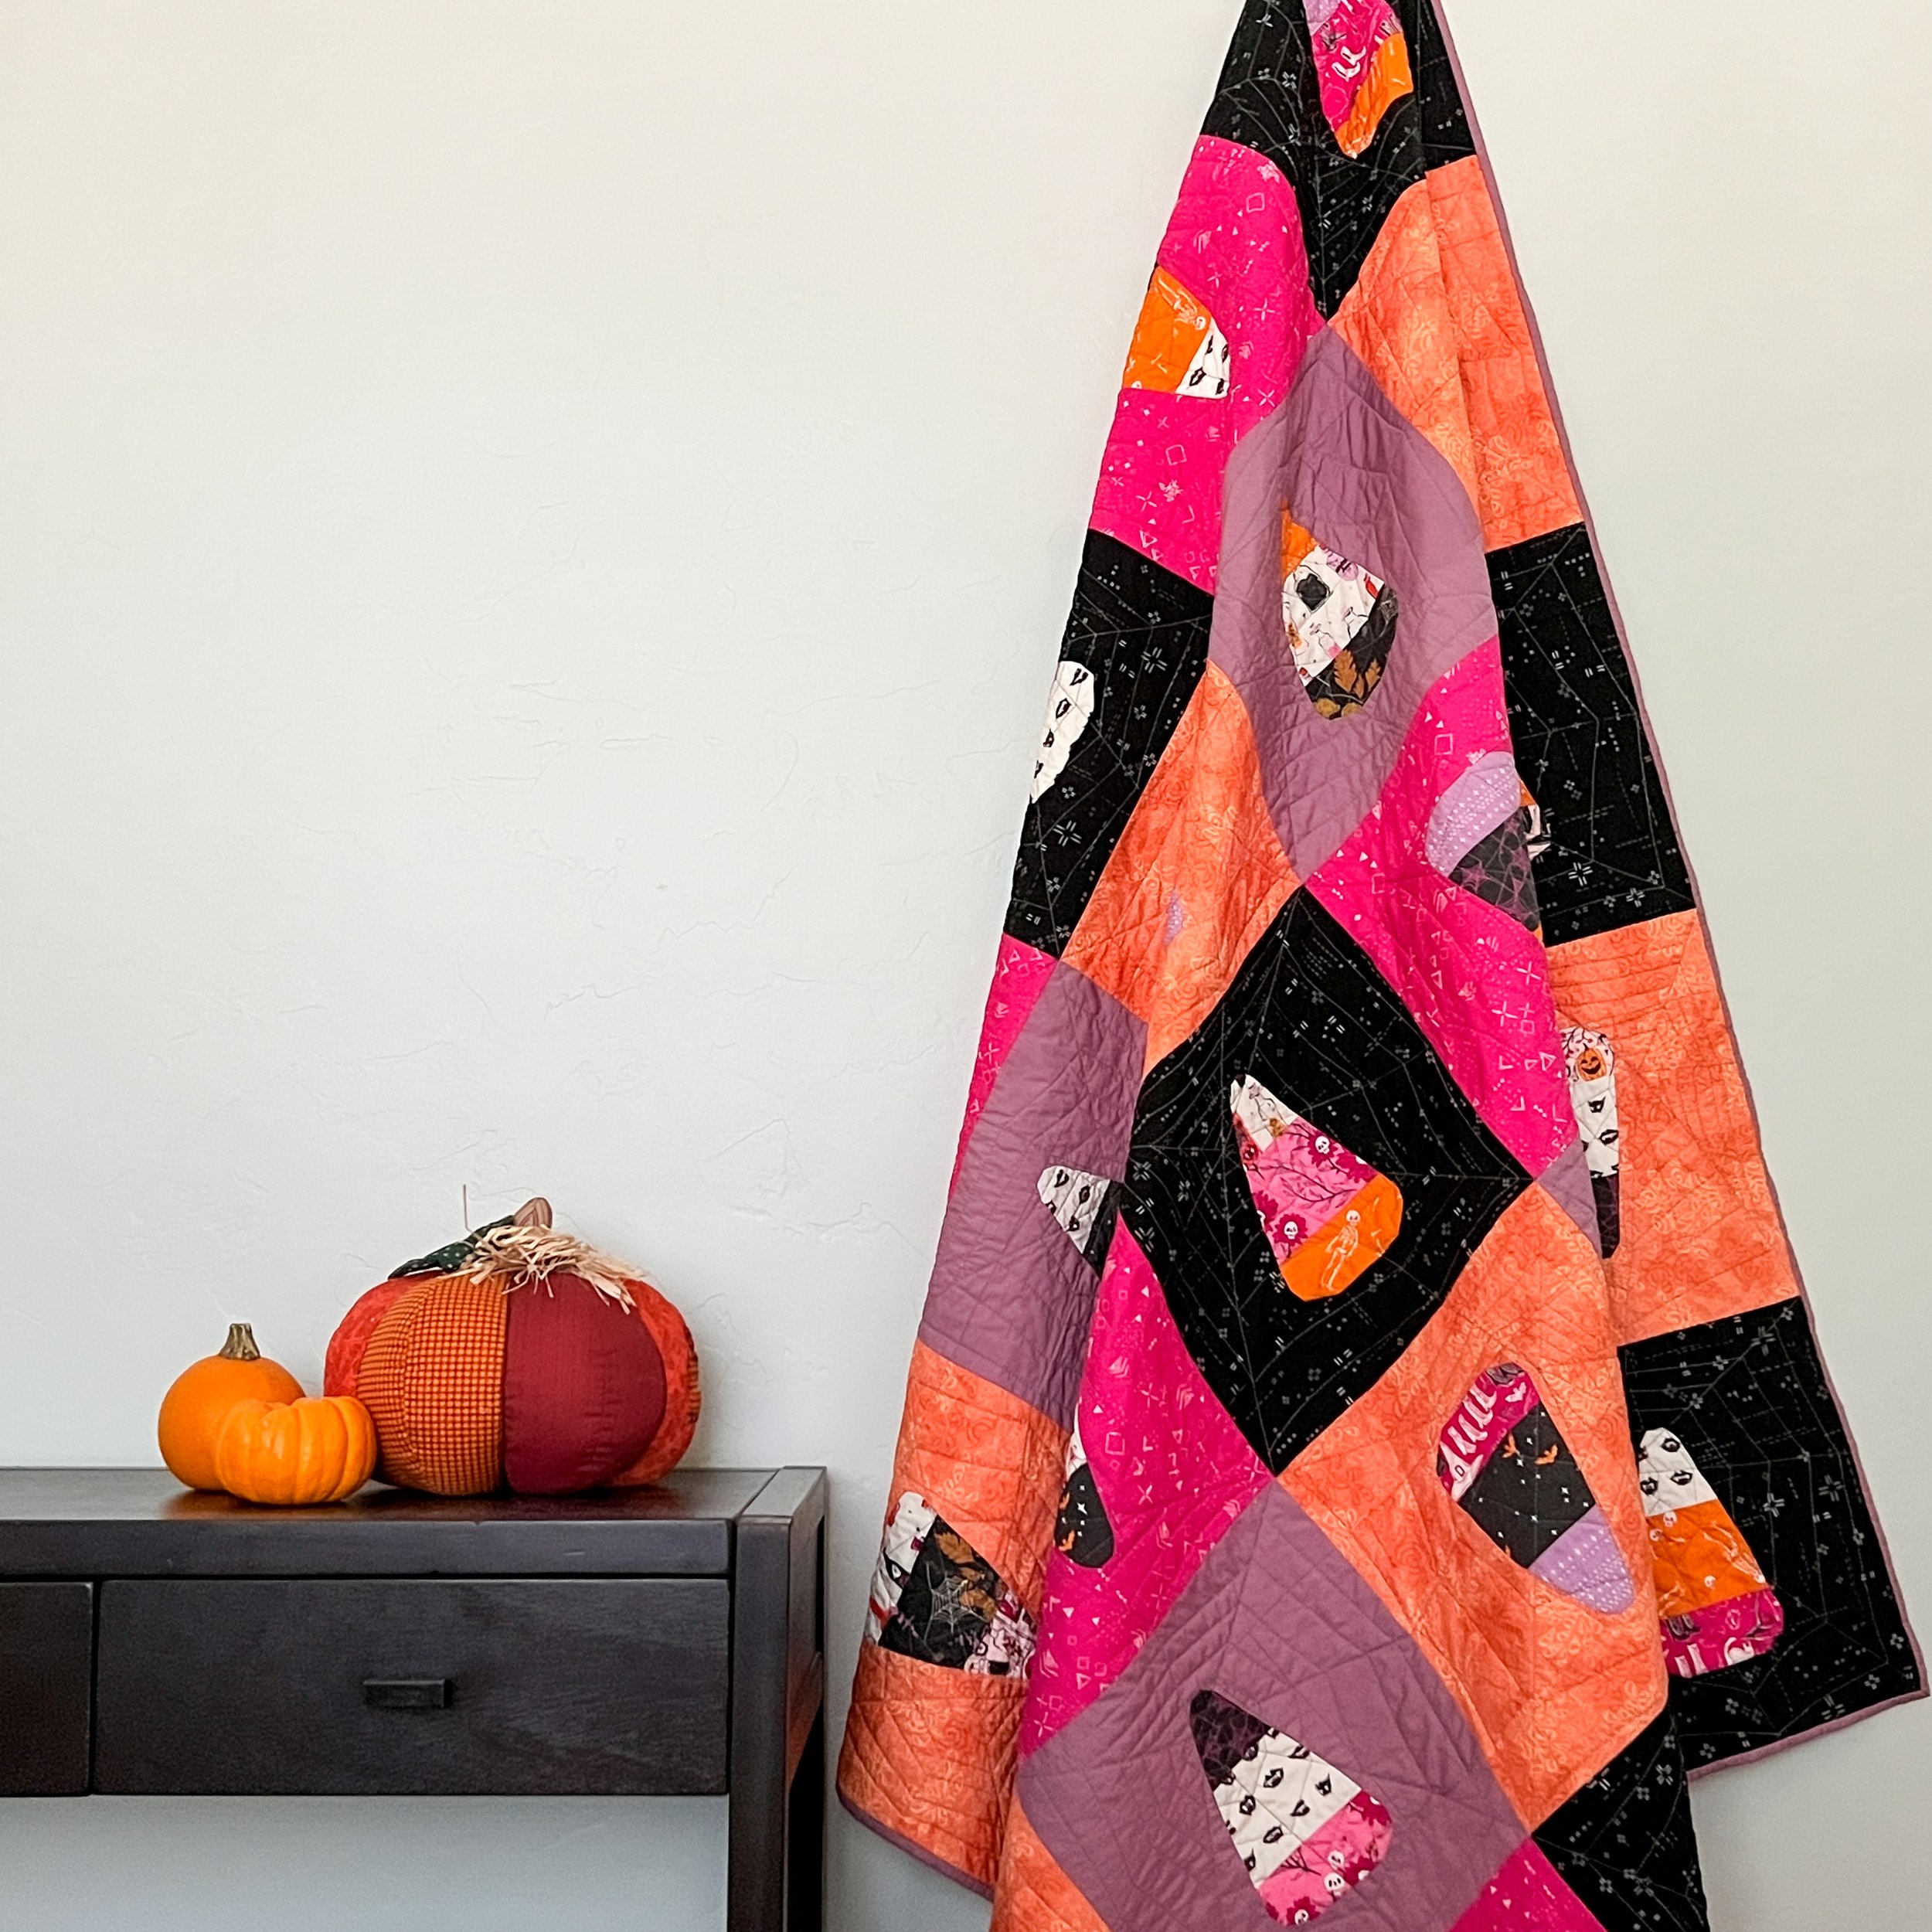
Last year, I tried my hand at spiderweb quilting on my Candy Corn Picnic Quilt, and it was a huge hit. The best part? It's not as complicated as it looks, and you can achieve the same stunning effect with a walking foot. This year, I've put together a step-by-step tutorial so you can add some spookiness to your block-based quilting projects.
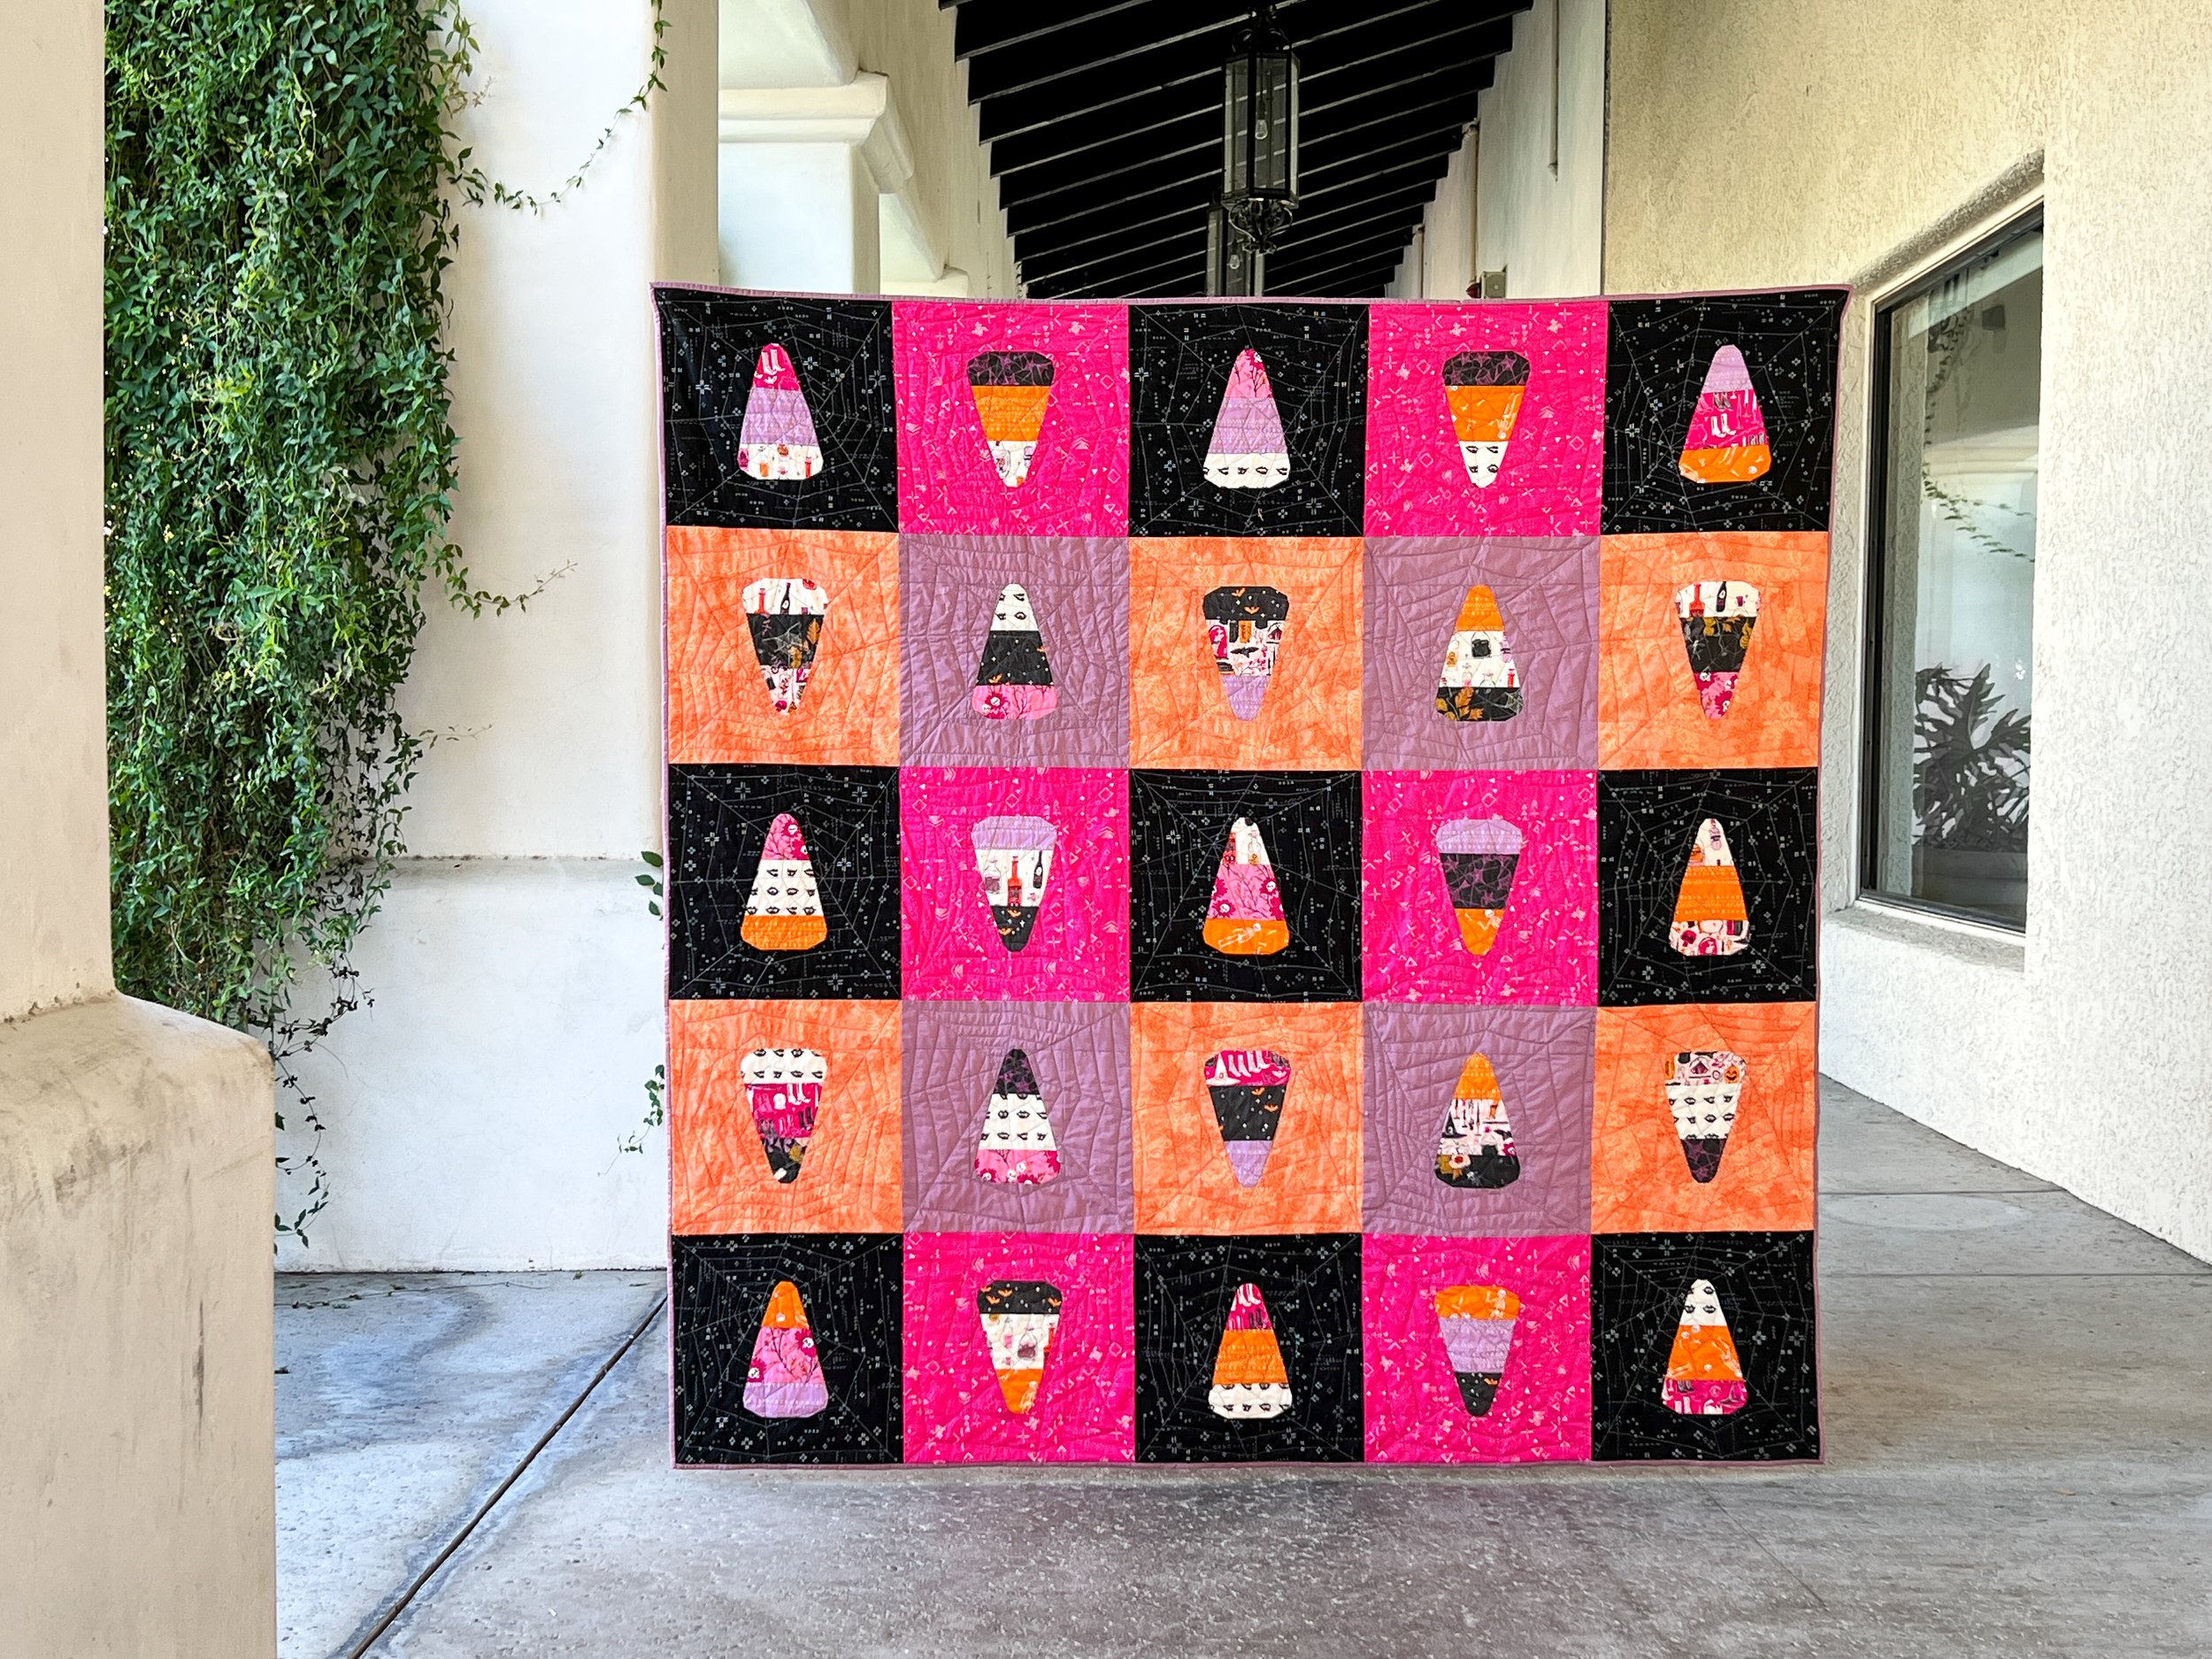
My Candy Corn Picnic Quilt from last year. Click to check out the free tutorial!
Whether you want to transform any block-based quilt or create your very own Candy Corn Picnic Quilt using my free tutorial and Candy Corn Charm FPP template, I've got you covered.
These instructions are written for quilters who prefer to plan and mark points before getting behind the machine. If you're skilled at sewing and making design decisions on the fly, you can skip some of the marking steps and follow the diagrams. It's worth noting that I never measured anything with a ruler during my quilting journey; every mark was made by eye. All suggested measurements and spacings are approximate, adding a natural and varied look to your quilting.
The instructions are split into two parts: the spokes for every block in the quilt are completed together, and the spiral webbing added one block at a time. So, thread your machine, secure your walking foot, and let's start spinning some spiderwebs!

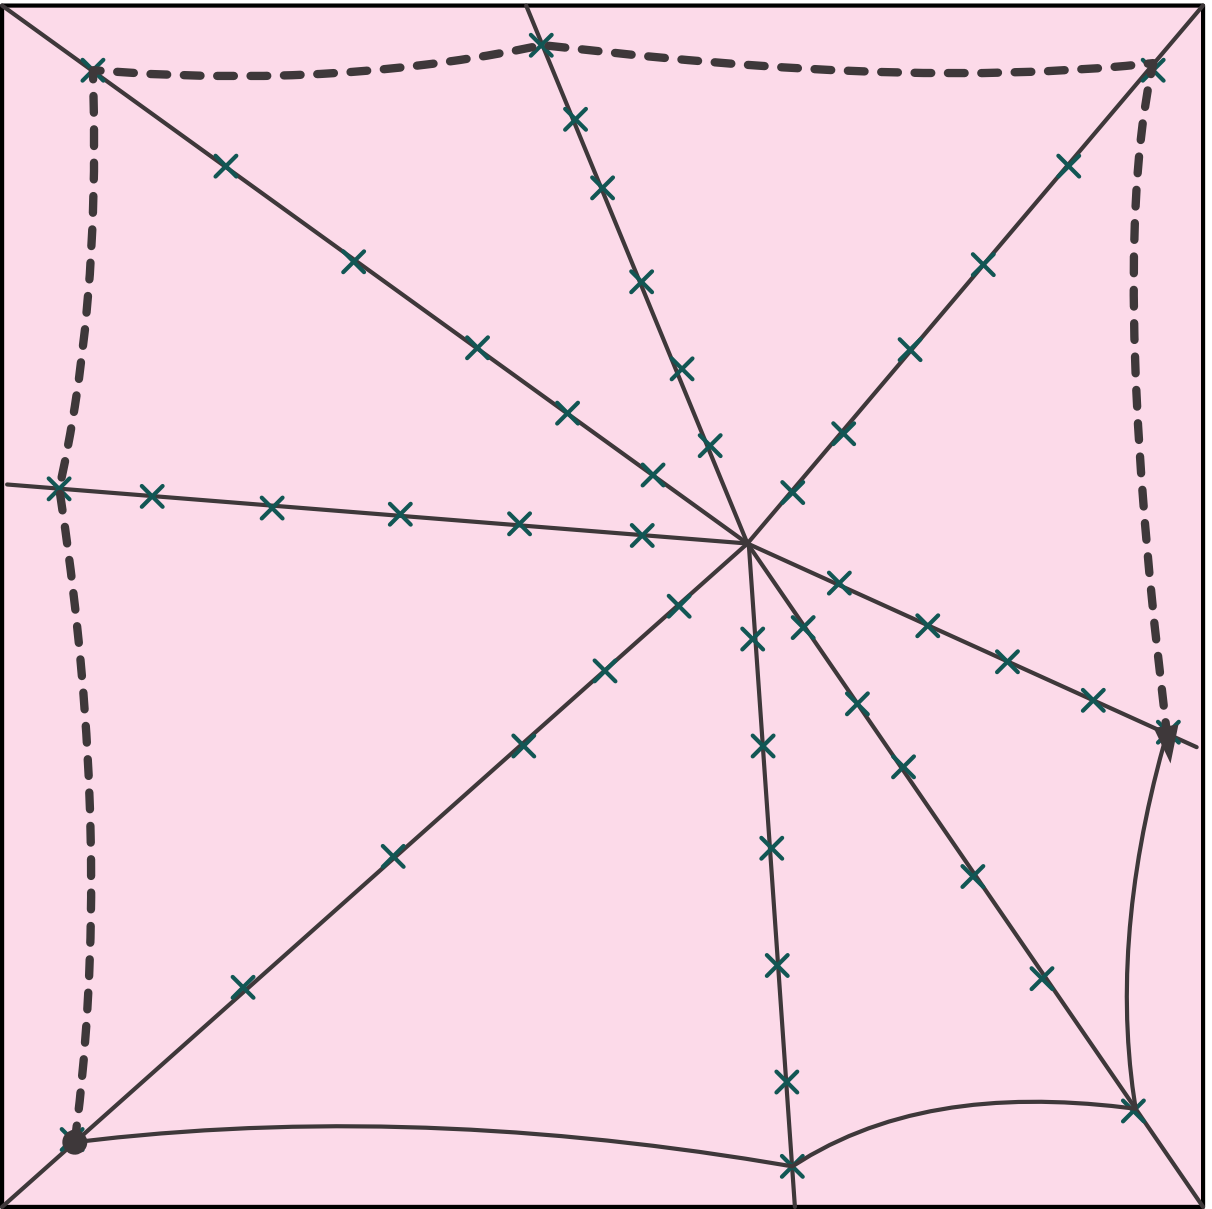
Spokes
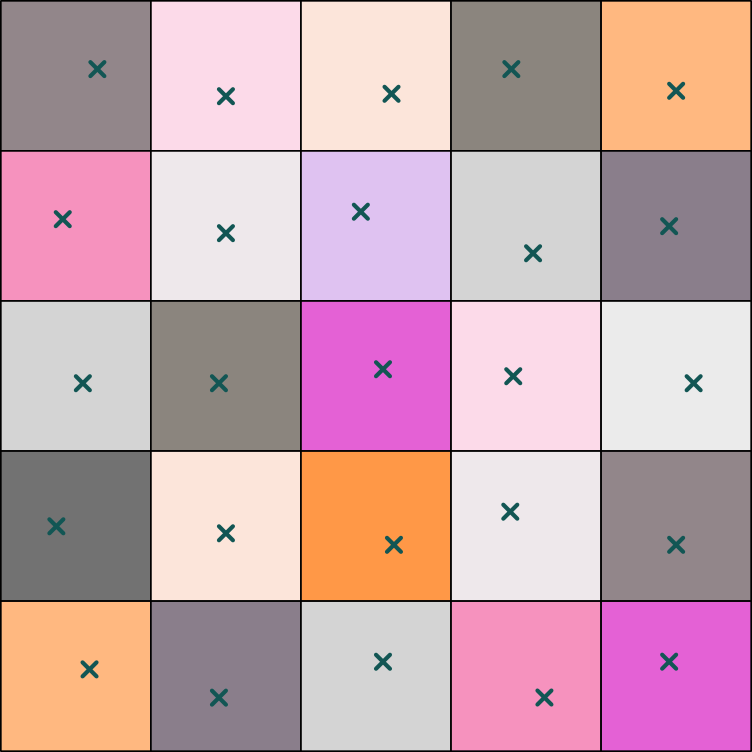
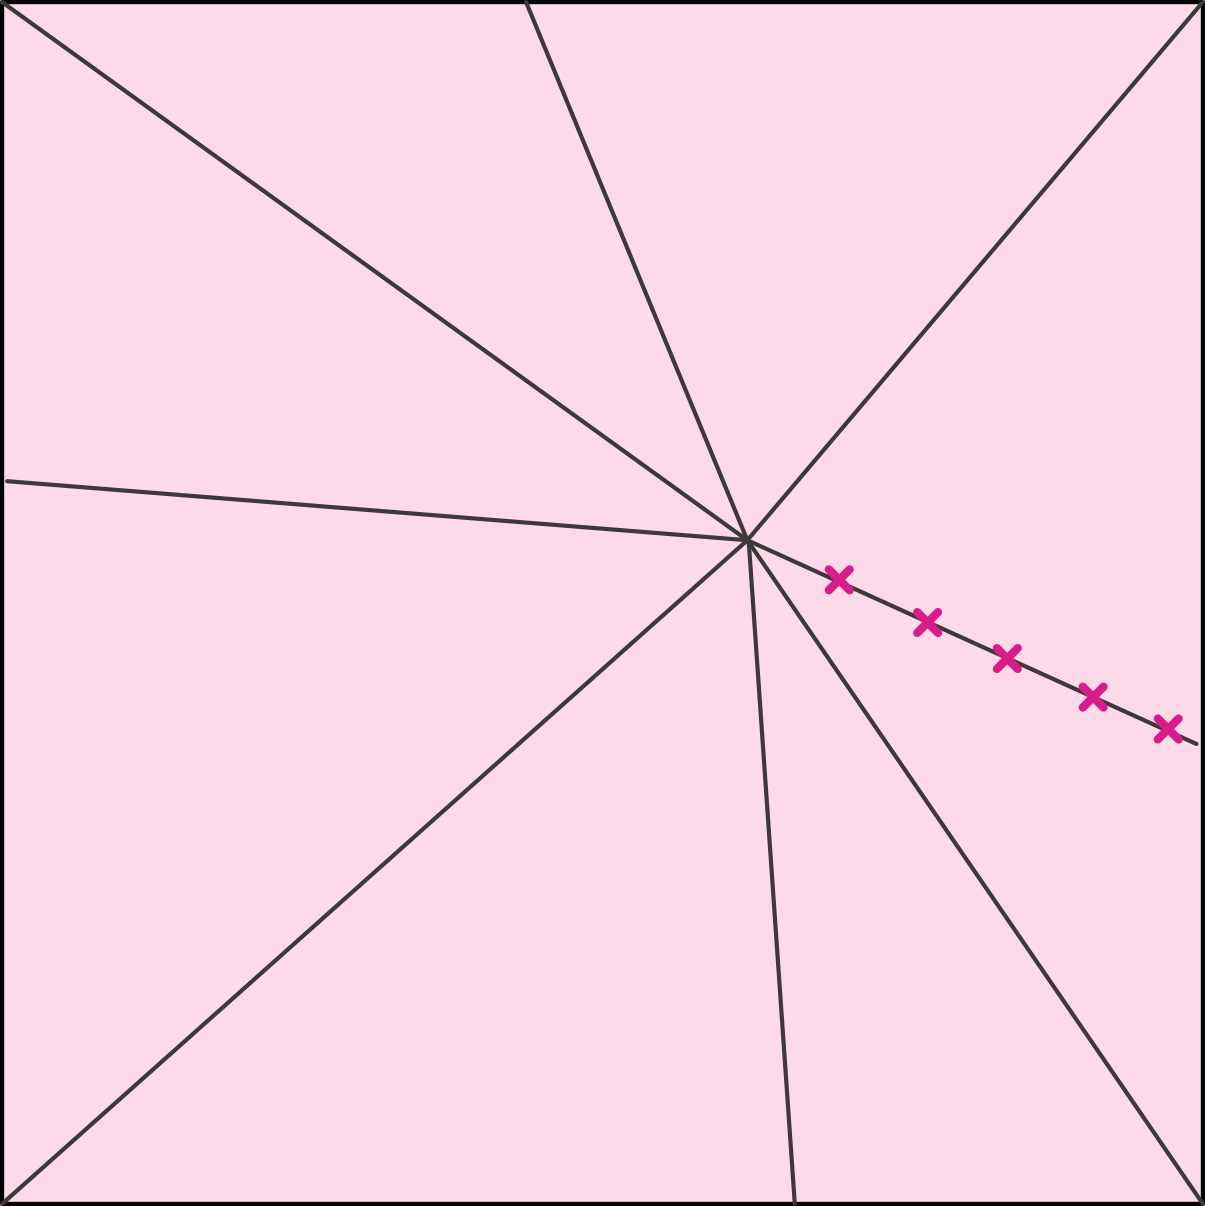
1. Use a removable marking pen to place a dot near the center of each square. These dots don't have to be precisely in the middle, so vary their positions slightly for each square.
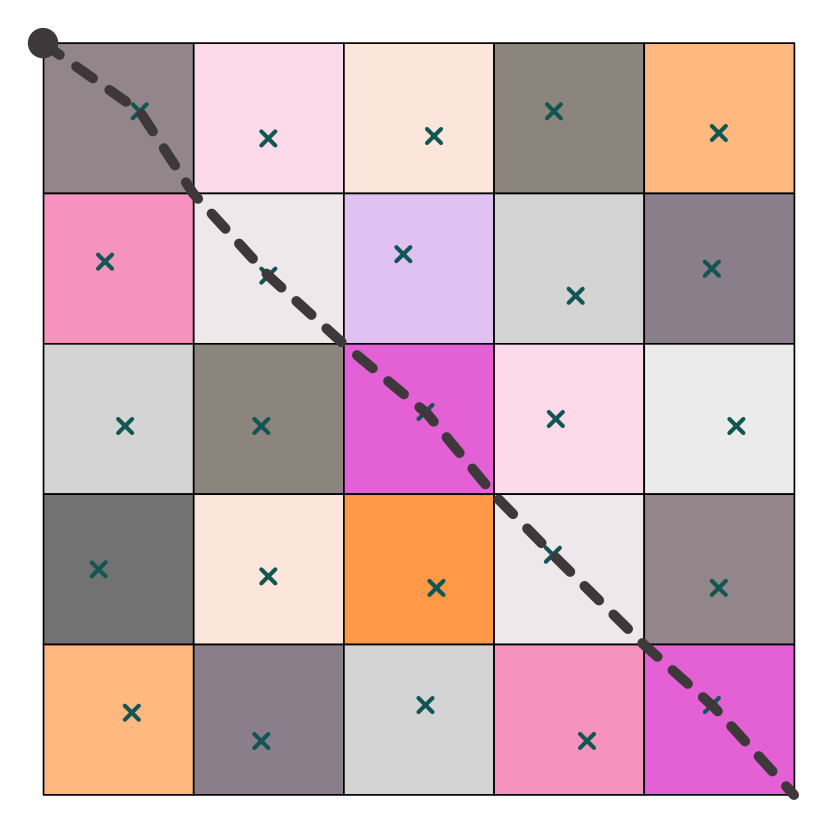
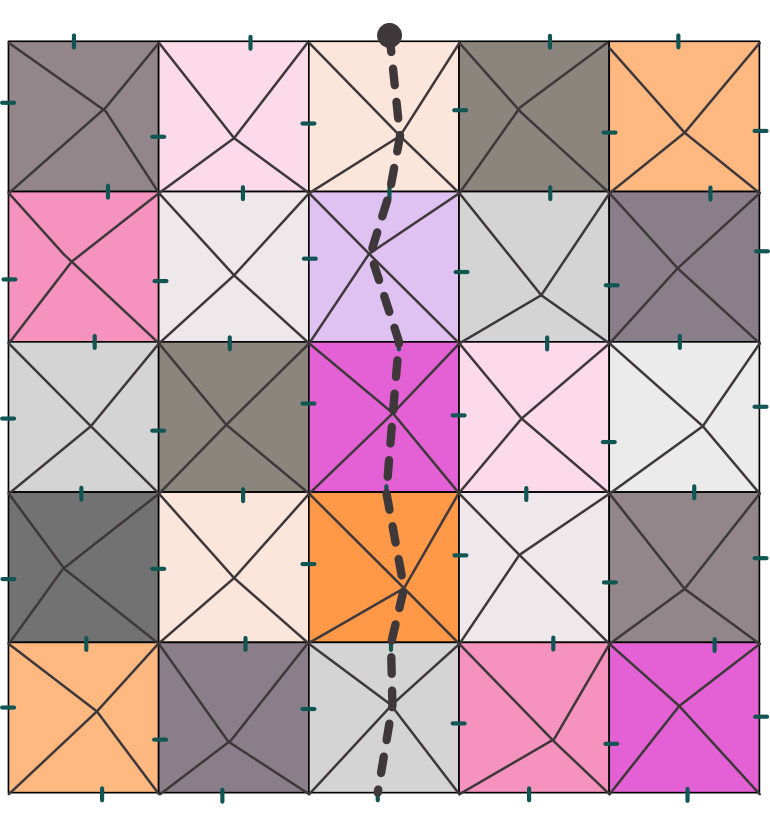
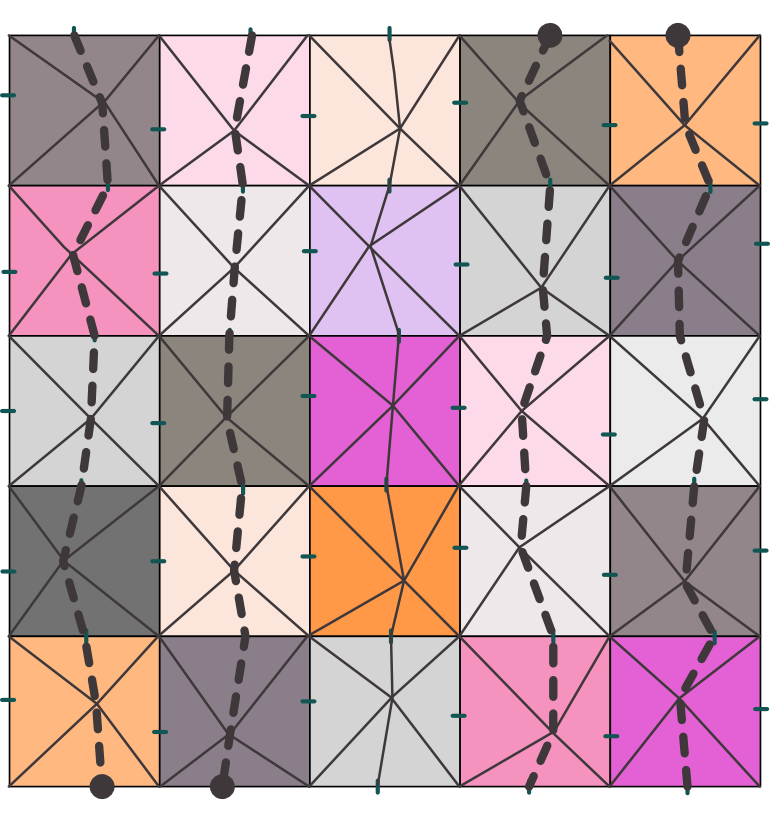
2. Begin with your walking foot in the top-left corner. Sew a straight line to the marked point in the first square. Keep the needle down, pivot, and sew a straight line to the opposite corner of the square you're on. Now, you're at the top-left corner of another square. Pivot again and quilt a straight line to the center mark of this square, pivot once more, and sew to the opposite corner. Repeat this process until you reach the opposite end of the quilt.
3. Repeat this technique from step 2 for the other diagonals from top left to bottom right.
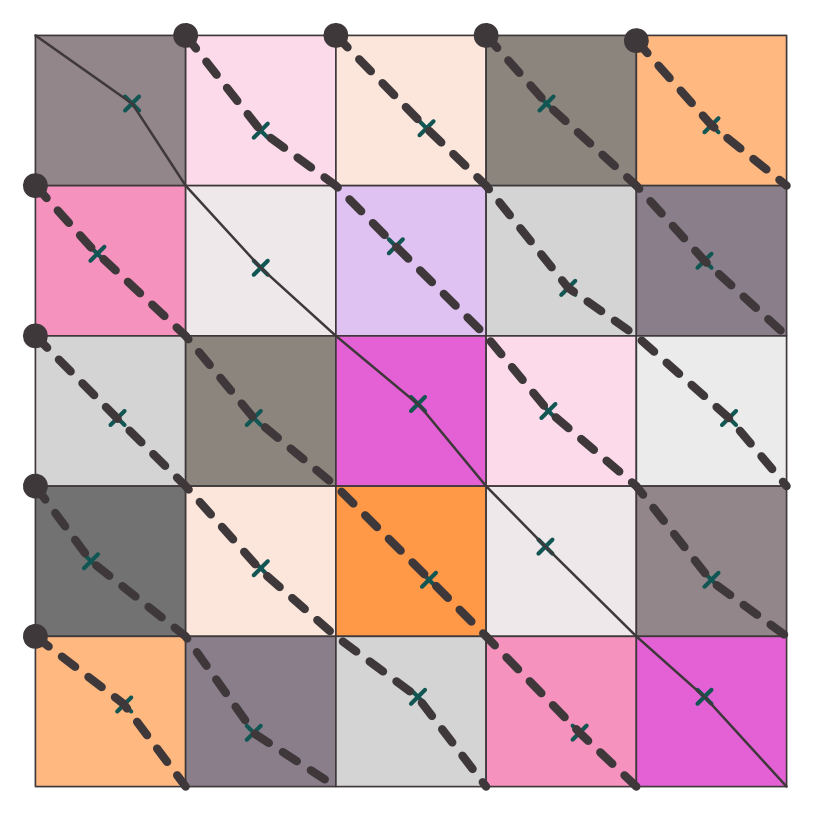
4. Repeat steps 2 and 3 for the diagonals from top right to bottom left.

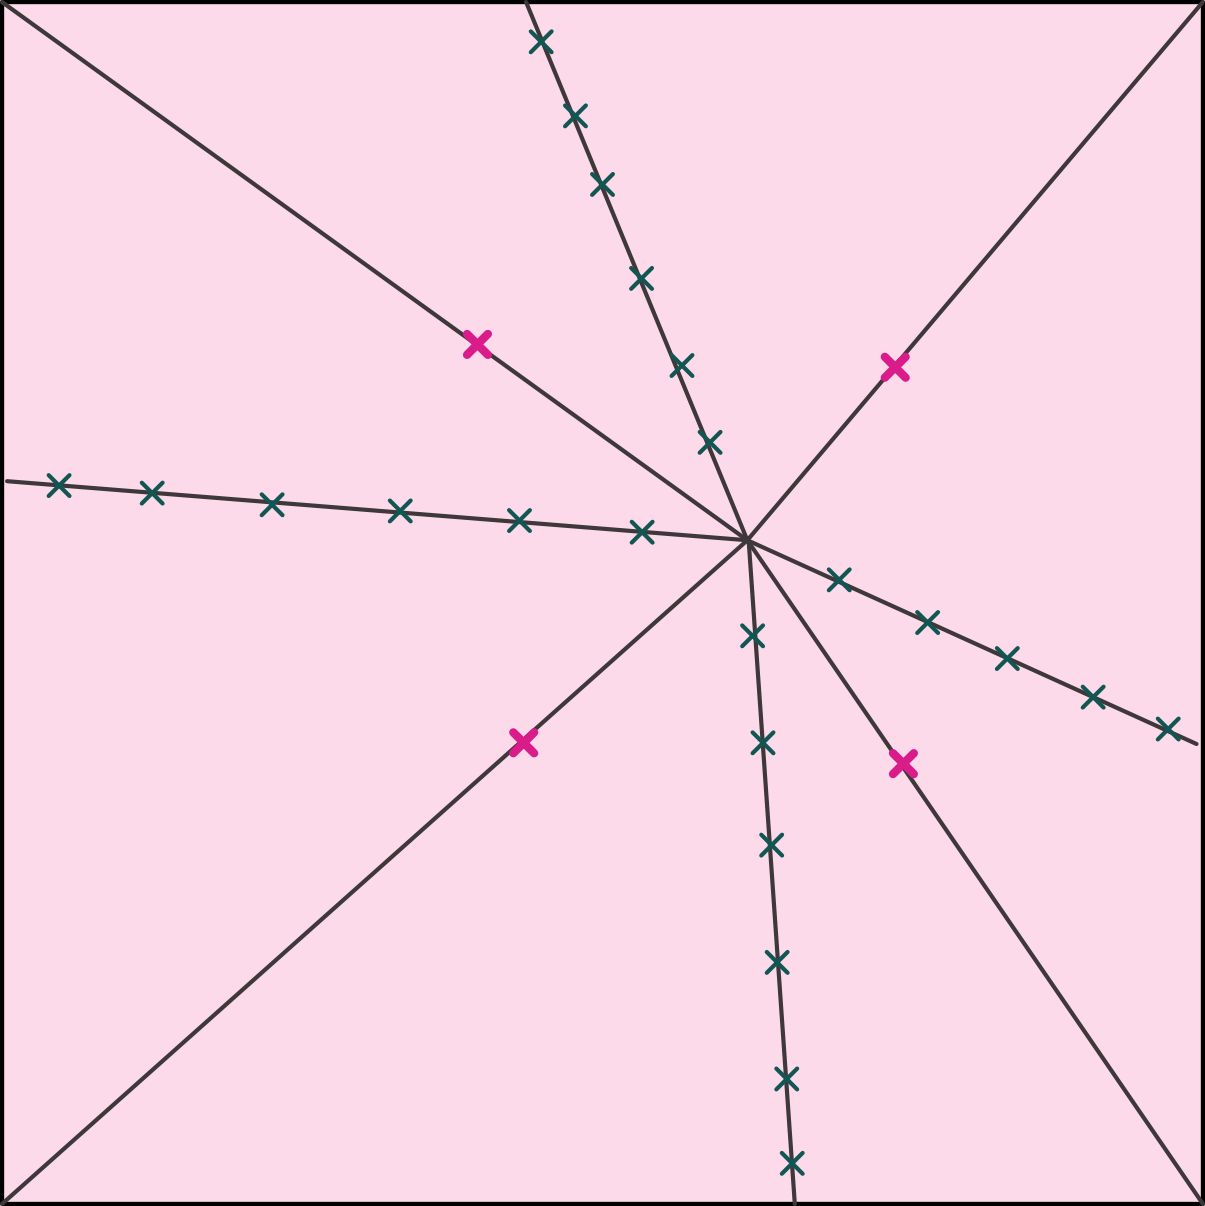
5. Use a removable marking pen to mark a point near the center of the edge of each square. Adjacent squares will share a mark. Slightly vary the position of these points as well.

6. Start at the top mark of the center column. Sew a straight line to the marked center of the square, pivot, and sew a straight line to the bottom mark of the square. Continue this process until you reach the bottom of the quilt.
7. Repeat step 6 for all the columns. To make sewing easier, turn the quilt 180 degrees and sew from bottom to top for all the columns to the left of the center column to reduce bulk in your sewing machine's throat space.
8. Finally, repeat the same process for all the rows.

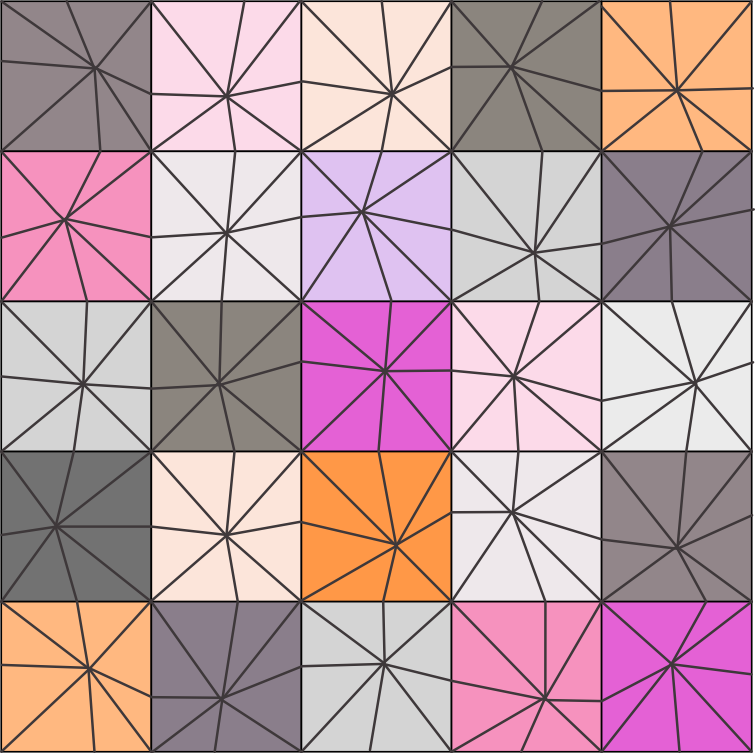
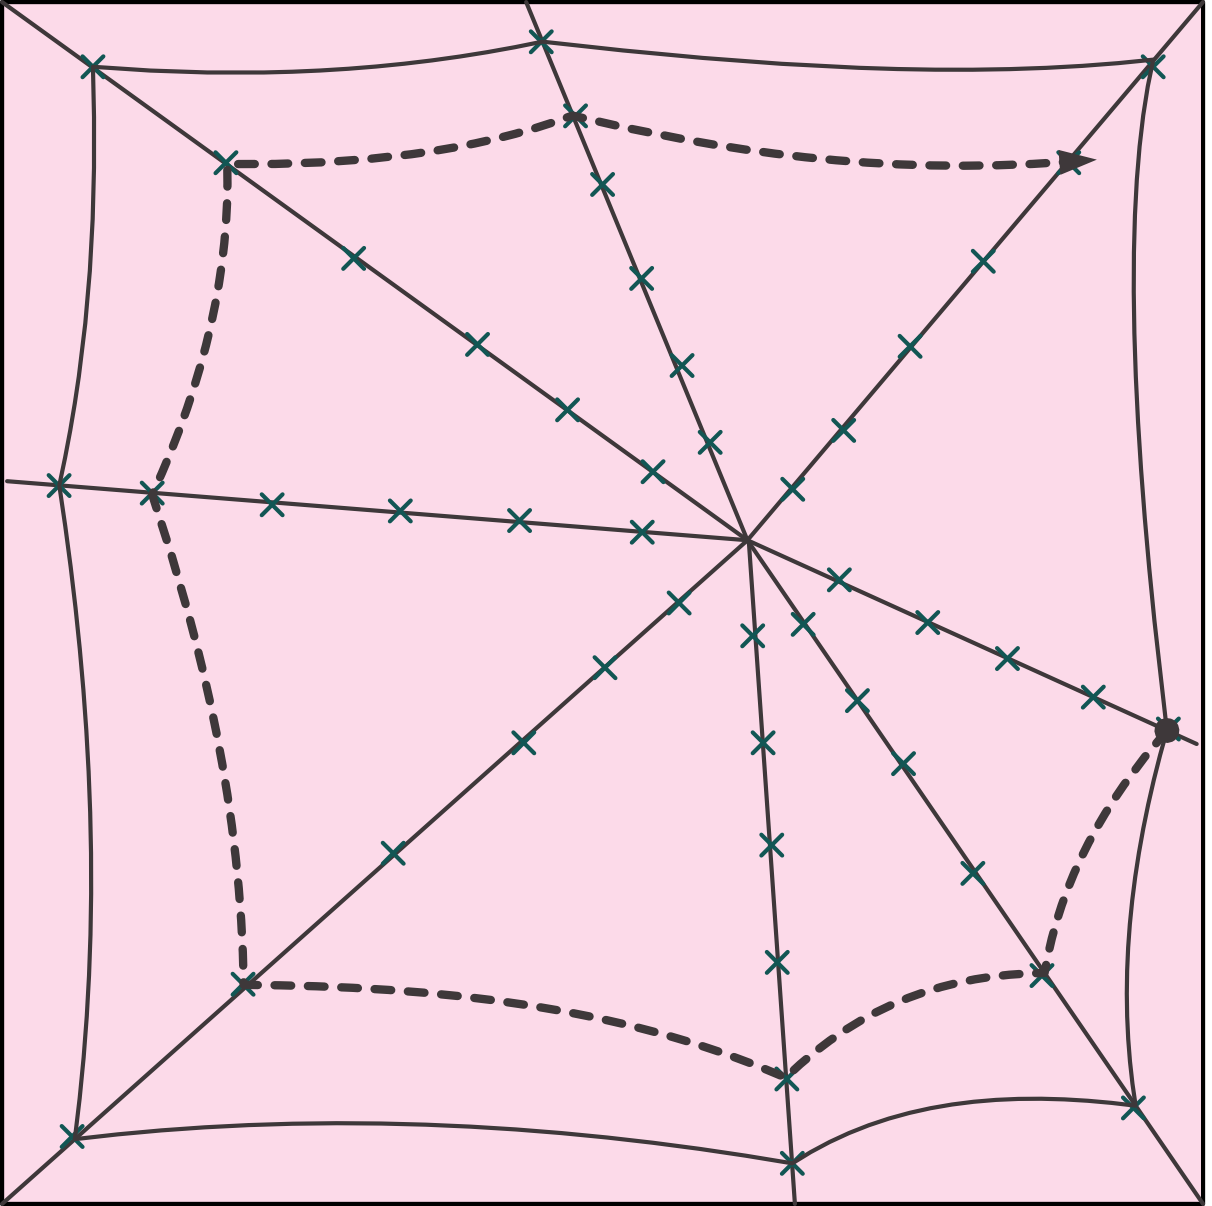
Now you have all your spokes ready to go! Your quilt should look like this, and you’re ready to add spirals. This is where the bewitching happens!
Spirals
9. Choose a block to work on and identify the shortest horizontal or vertical (not diagonal) component. You can mark it with a fabric pen or a basting pin for reference. Then, mark five equally spaced points along this segment, with the first point being fairly close to the edge of the block to help fill the space.
10. For each of the other horizontal and vertical components, mark six equally spaced points along the segment.

11. Add a mark about one-third of the way from the center of the web on each of the diagonal segments.
12. Place two evenly spaced marks between this mark and the center for each diagonal segment.
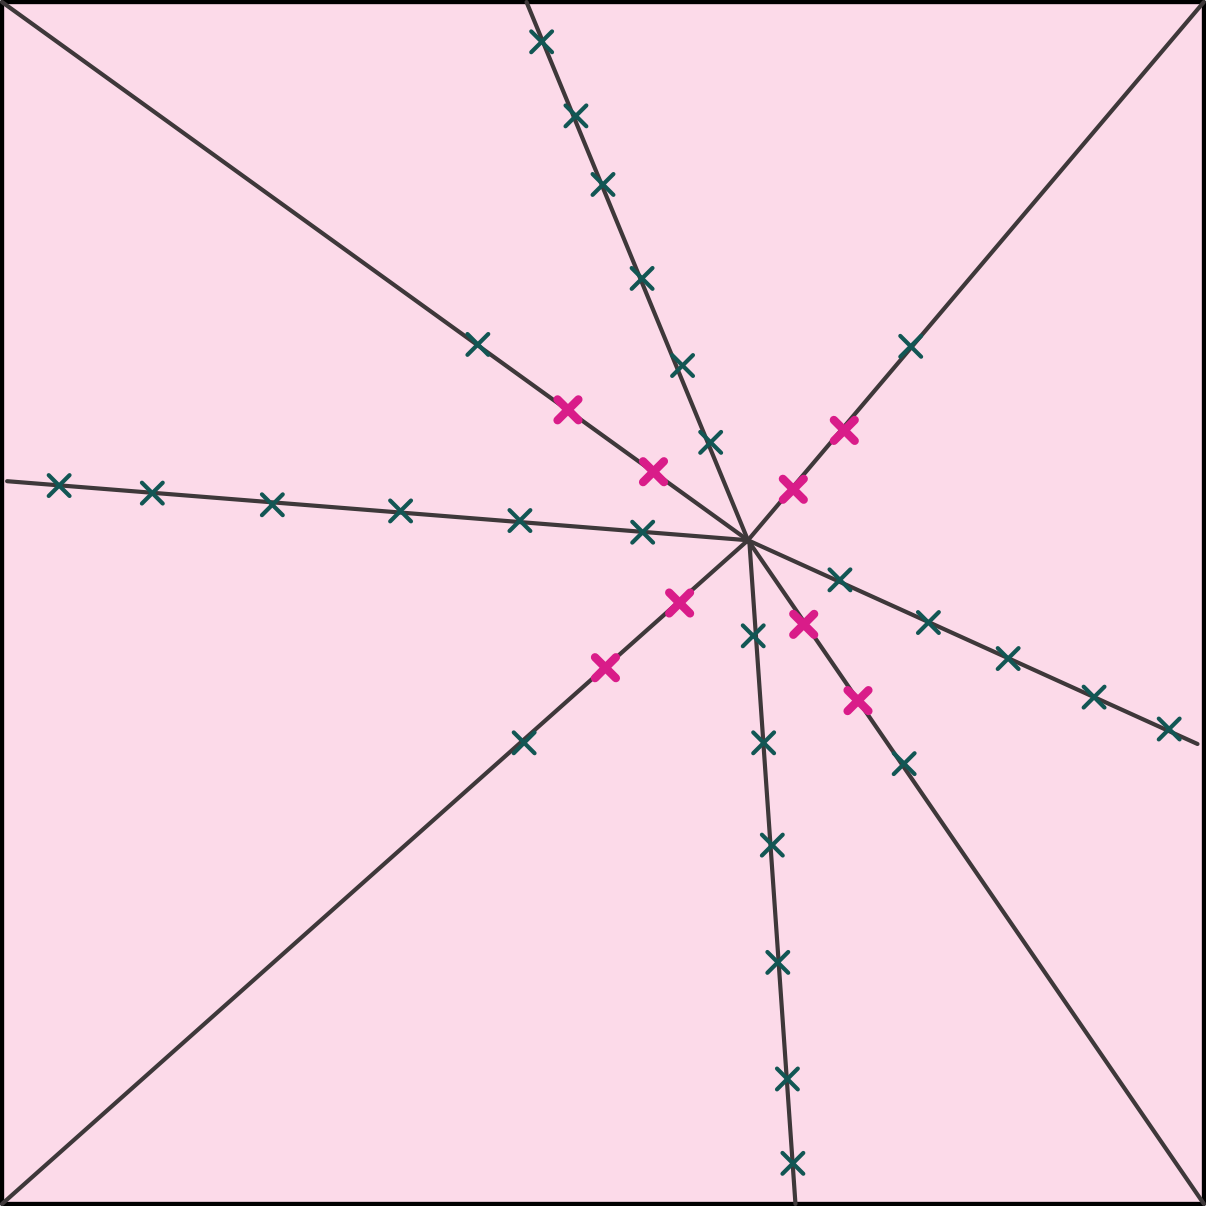
13. Add three evenly spaced marks between the first mark and the corner for each diagonal segment.
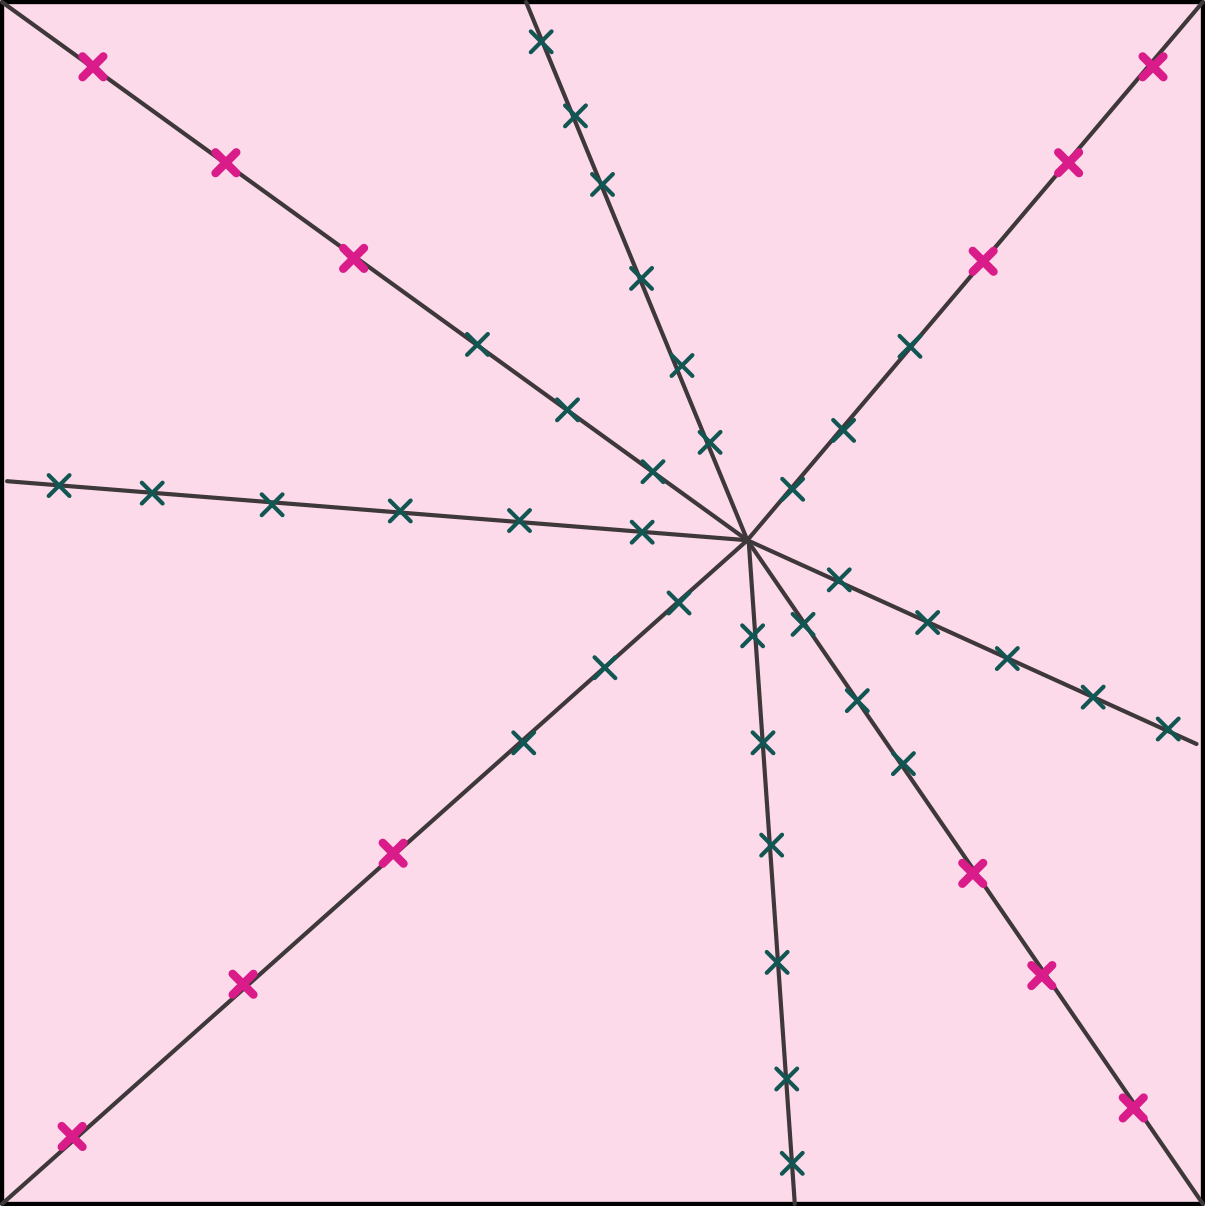
14. Start quilting at the outermost point on the shortest vertical or horizontal spoke that you marked first. Sew either clockwise or counterclockwise, pivoting at all the outer points for each segment until you return to your starting point. Add a slight curve to each segment as you go.

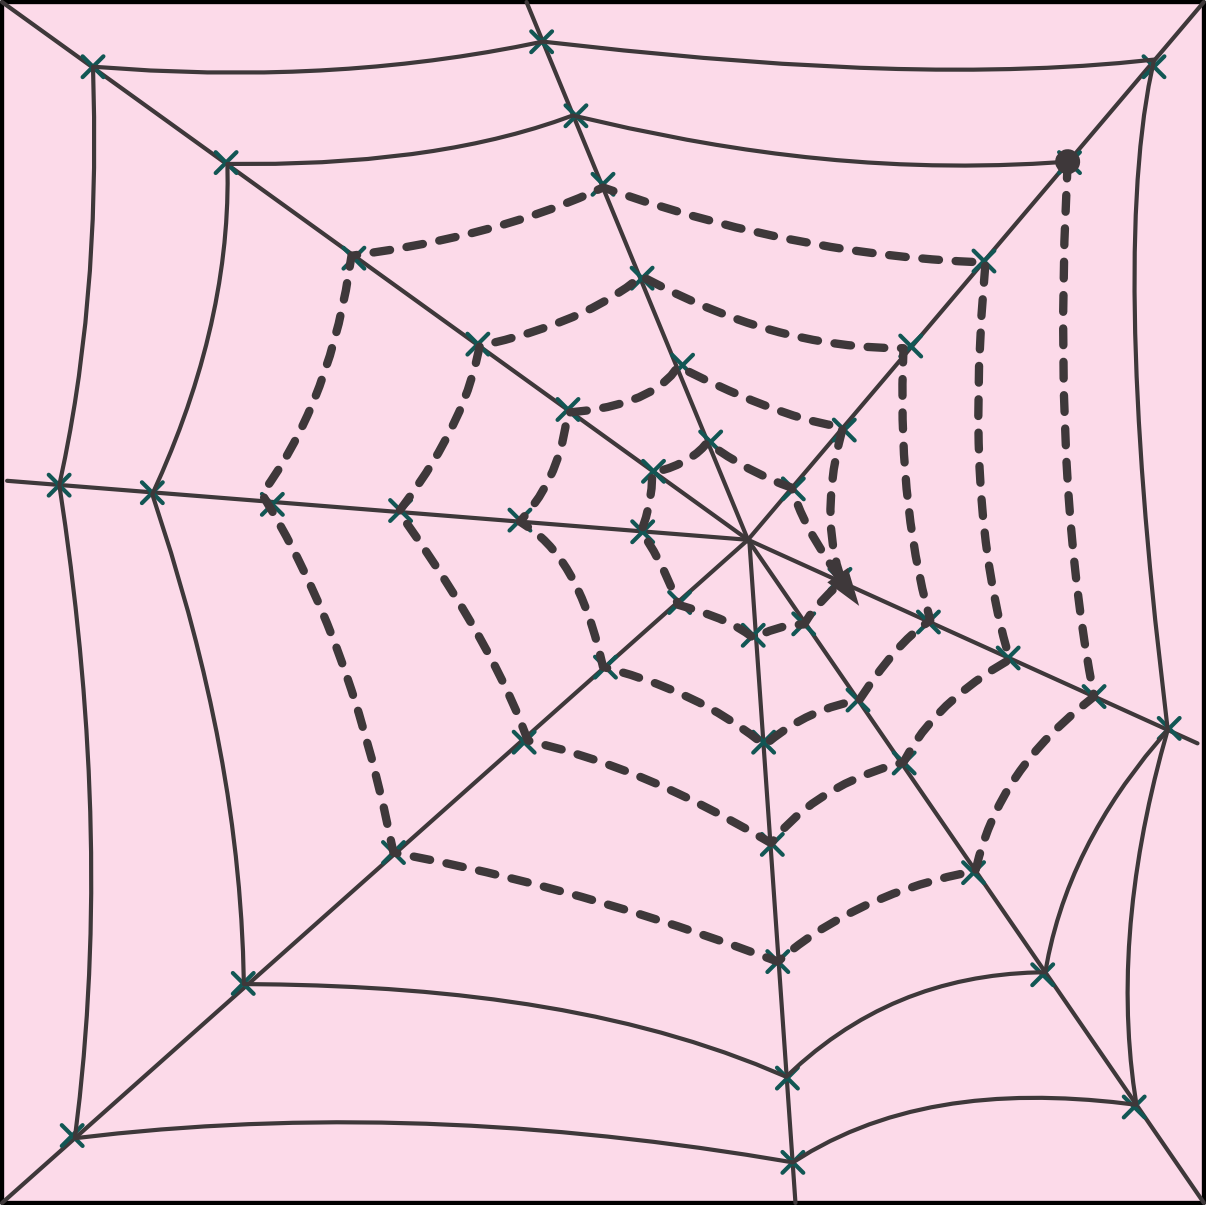
15. Continue sewing in the same direction, point-to-point, and spiral toward the center while adding slight curves until you reach the starting point.
16. After reaching the starting point, begin spiraling inward, point-to-to point. Continue adding curves to the segments.
17. Once you reach the last point, connect the spiral to the inner point of the next segment. Finally, knot and bury thread ends.
Tips
When reaching pivot points, drop your feed dogs (or set your stitch length to zero) and create an extra stitch in the same spot. This prevents skipped stitches, which can sometimes occur at pivot points during quilting.
Select a bobbin thread that contrasts with your quilt backing. This will make the back of your quilt as visually appealing as the front.
This technique works well for 8"-12" blocks. However, if your blocks are significantly larger or smaller, feel free to adapt by increasing or reducing the number of points on each spoke when marking the spiral designs. This flexibility allows you to maintain a balanced and visually appealing spiderweb design regardless of your block size.
Congratulations, fellow quilters, on mastering the art of spiderweb quilting with a walking foot! Your blocks are now adorned with spooky and festive quilting that is sure to impress!
If you're feeling inspired to take on a fun and tasty project, look no further than my Candy Corn Picnic Quilt tutorial. The spiderweb quilting technique you've just learned can transform this quilt into an eye-catching masterpiece. To get started, you'll need the essential Candy Corn Charm FPP block template.
Or if you want to bypass all the quilting, you can consider purchasing the very demo quilt featured in this tutorial.
When you try these techniques, don't forget to snap a picture of your work and share it on social media. Be sure to tag your posts with #SweetPixelQuilts so we can all admire your beautiful work.
Thank you for joining me on this quilting adventure, and I can't wait to see your spiderweb creations! Happy quilting, and may your trick-or-treat baskets be filled this year!
